
Vector drawing lesson
Draw a Chinese knot in Illustrator.
Draw a Chinese knot ornament in Adobe Illustrator with an editable starter SVG, alternating crossings, custom cord colors and a tassel. Export SVG or transparent PNG.
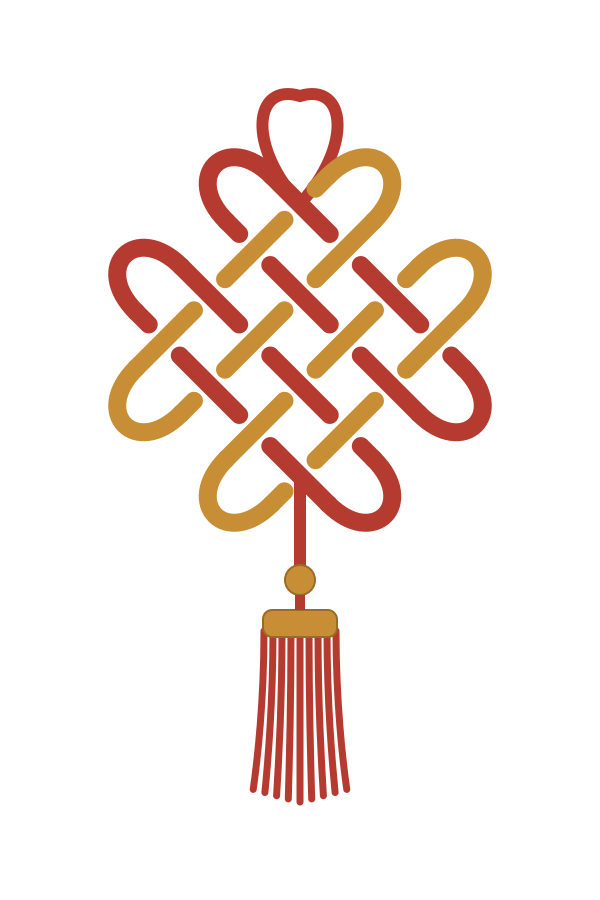
A small ornament, built from paths.
Use Adobe Illustrator to turn a simple loop grid into a Chinese knot ornament for a card, invitation or digital illustration. You will edit curves, make the cords alternate over and under, then draw a bead, binding and fringe. The finished example above is the same artwork supplied in the download.
This is a decorative vector drawing exercise. To learn an actual cord route, use our Chinese knotting lessons.
You need: Illustrator on desktop, the starter file below and basic familiarity with selecting an object. Menu names here use the English desktop interface; the location of a tool can vary with your workspace.
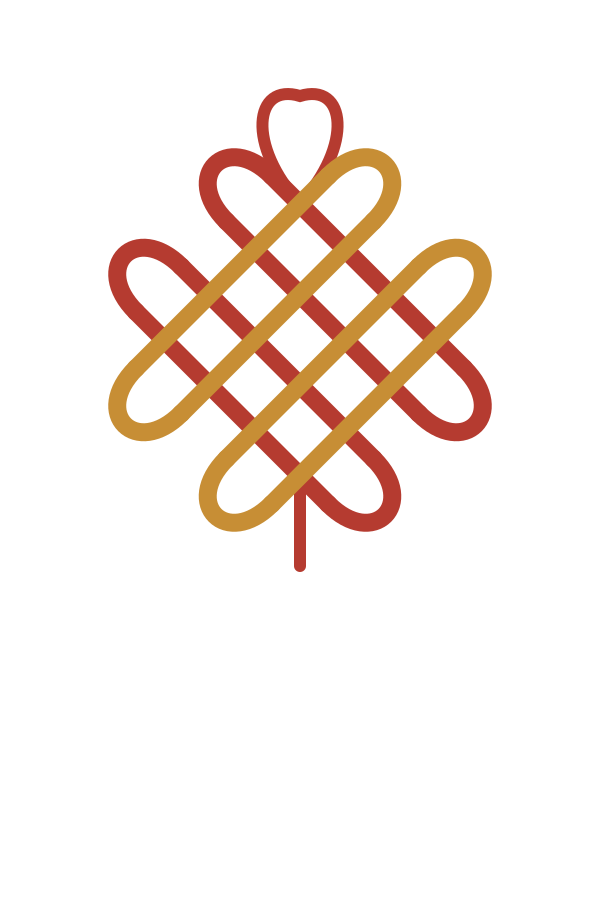
Starter: uncut loop grid, hanging loop and connector. Finished: alternating crossings and a complete tassel. Both use a 600 × 900 px canvas.
01. Open the SVG as an editable document.
- Download the starter, then choose File → Open and select illustrator-knot-starter.svg.
- Choose File → Save As and save an Illustrator .ai working copy so the original starter remains available.
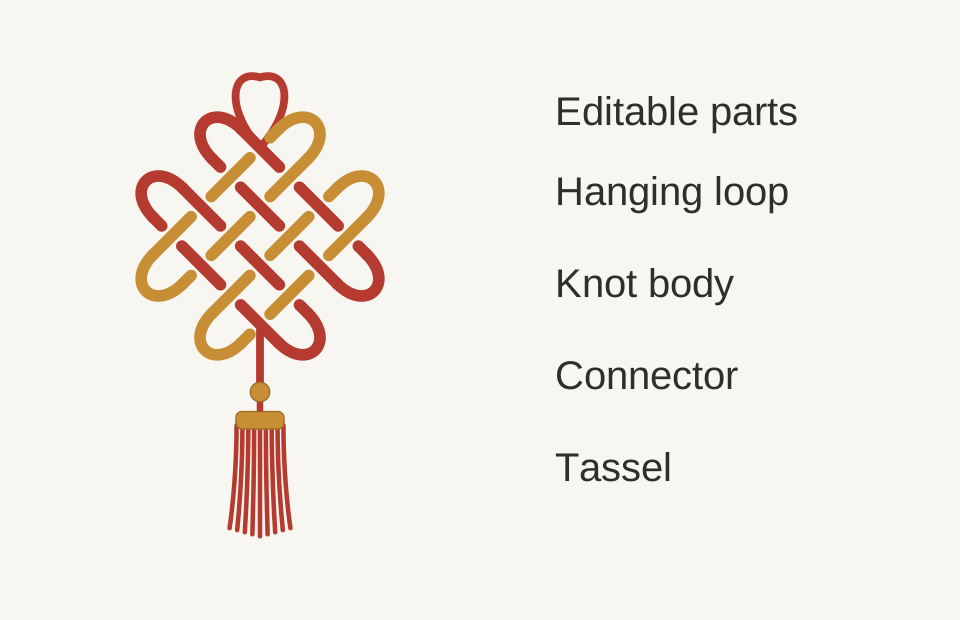
- Open Window → Layers. Expand the artwork until you can select the groups Hanging-loop, Connector and Knot-body. Inside the body are horizontal-cord and vertical-cord.
- Use the Selection tool (V) to move a complete group. Use the Direct Selection tool (A) to select a single path or anchor point inside it. Double-clicking a group enters Isolation mode; press Escape to leave it.
The horizontal and vertical names describe the grid before its 45° rotation. On the canvas they appear as two diagonal directions. The starter contains vector strokes, so there is no image to trace. If you need to separate a group, select that group and right-click and choose Ungroup; keep the body grouped when moving the whole ornament.
02. Shape the outer loops without shifting the grid.
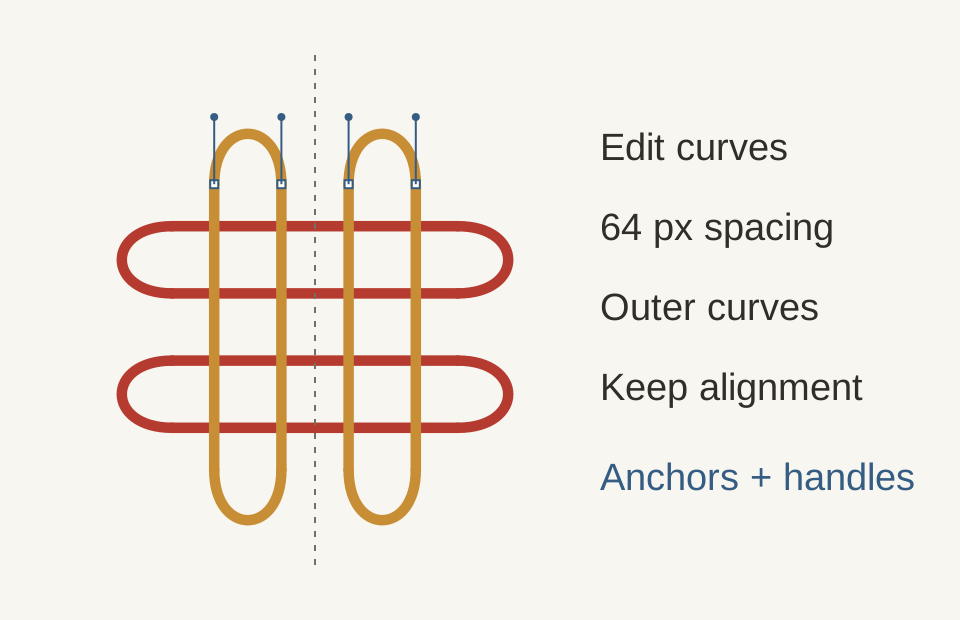
The starter has four equally spaced lines in each direction, joined visually by paired curved returns. The original spacing is 64 px, and the cord weight is 18 px. Start by changing one outer loop.
- With Direct Selection, click a curved return near the outside of the knot. Click its end anchor to reveal the direction handle.
- Drag the handle a little farther out to make the loop rounder, or shorten it to make a tighter loop. Keep the end anchor on its existing straight line so the join stays smooth.
- Undo the experiment if the loop becomes pointed. A small handle adjustment is usually enough; the interior crossings should stay where they are.
- To position the complete drawing, select Knot-body, open Window → Align and choose Align to Artboard, then Horizontal Align Center. Center the hanging-loop and connector groups the same way. Avoid aligning individual cord segments: that would collapse their spacing.
To redraw a return yourself, use the Pen tool (P) with no fill. At each end of the curve, click-drag a handle along the adjoining straight line. Two smooth anchors are enough for a U-shaped return; compare it with the starter before replacing the original.
03. Cut the underpassing cord at each crossing.
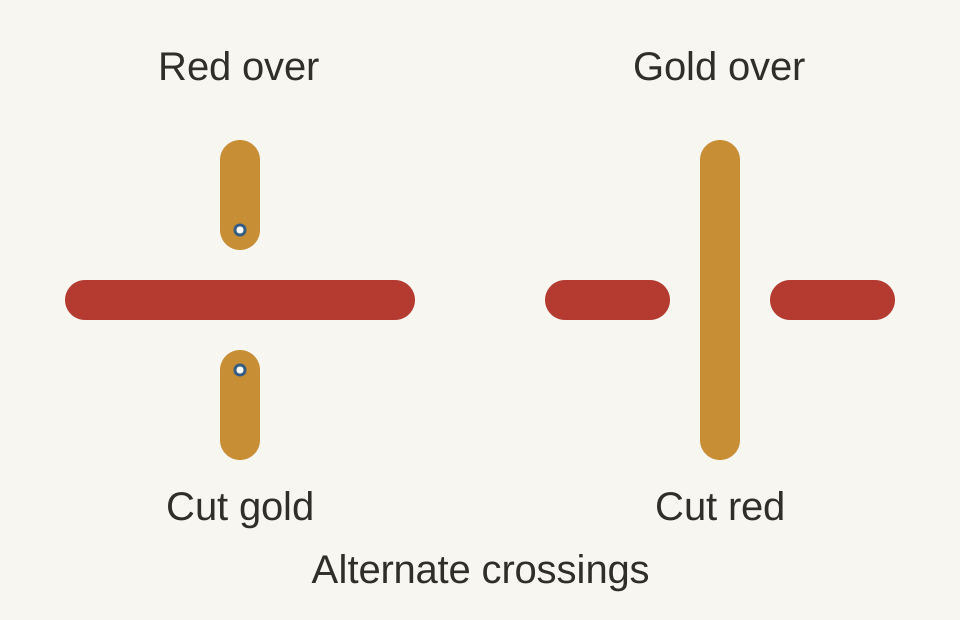
In the starter, one entire cord direction sits above the other. A woven drawing needs the top direction to change from one crossing to the next. Make real gaps in the lower cord so the design also works on colored backgrounds.
- Pick the first crossing on the topmost red row, reading the unrotated diagram from left to right. Let red pass over gold there.
- Select the gold path with Direct Selection. Switch to the Scissors tool (C) and click the gold path on each side of the crossing, about 22 px along the path from the crossing center. That makes a 44 px middle segment.
- Switch back to Direct Selection, select only that short middle segment, and delete it. Click away and inspect the crossing: red should remain continuous, with two separated gold ends.
- At the next crossing on that red row, reverse the arrangement: leave gold continuous and cut the red path. Continue over, under, over, under across the row.
- Begin the next row with the opposite order. Repeat until all 16 crossings alternate. In each crossing exactly one direction stays continuous.
Keep Round Cap in the Stroke panel. With an 18 px stroke, each rounded end extends 9 px beyond its anchor; the 22 px cut distance leaves about 4 px of clear space beside the overpassing cord. Zoom in to check both sides. For precise cuts, temporarily draw a 44 px reference line centered on the crossing and parallel to the underpassing path, then remove it after cutting.
Do not place a paper-colored rectangle over the lower cord. That would show up as a patch when you export a transparent PNG or use the SVG on a different background. Open the finished SVG beside your working file if you need to compare the alternation.
04. Change cord color and stroke weight.
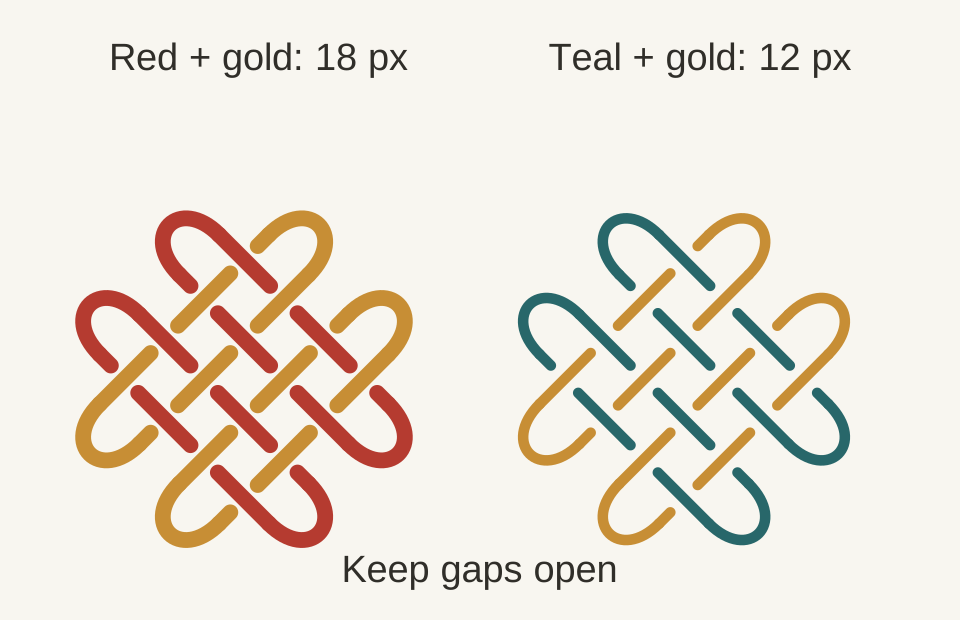
- Select the paths in horizontal-cord. Activate the Stroke color box, then double-click it to open the Color Picker. The example uses #B53B30.
- Repeat for vertical-cord with #C78E35. Use contrasting colors while checking crossings, even if you eventually choose one color for both.
- Open Window → Stroke. Set the body paths to 18 px weight, Round Cap and Round Join. Leave Fill set to None.
- Try 12 px for a lighter drawing, then compare at the size you intend to use. If you increase the weight, enlarge the cut gaps so the lower ends do not touch the top cord.
Keep the hanging loop and connector slightly lighter: the example uses 12 px. You can keep the strokes editable in your working file. Outlining them is unnecessary for this lesson and would change how you edit the cord width.
05. Draw a bead, binding and fringe.
The starter leaves room below the connector for your tassel. Keep these new objects in their own group so you can move the finish without disturbing the knot body.
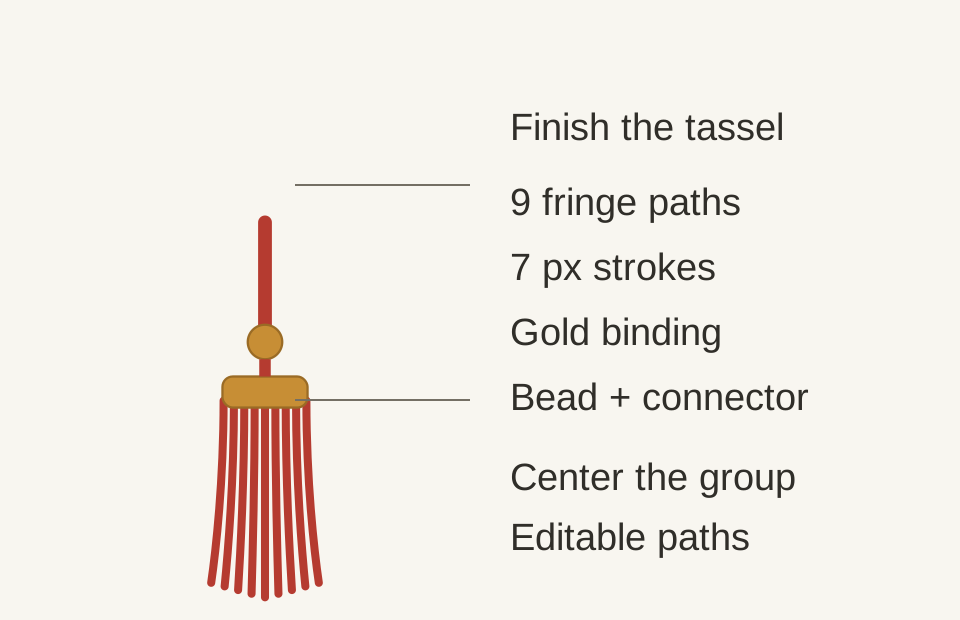
- Use the Ellipse tool (L) to draw a 30 × 30 px circle. Give it a gold fill and a fine darker gold stroke. Center it at the connector’s lower end.
- Draw a short red line from the bottom of the bead to the binding. In the example the bead center is at x 300, y 580; its bottom is at y 595, and the line ends at y 610.
- Draw a rounded rectangle for the binding: 74 × 27 px, centered at x 300, with its top at y 610. Set a gold fill, a 2 px darker gold stroke and a corner radius of about 9 px.
- Use the Pen tool to draw one open fringe path starting at y 631, just beneath the binding. Give it no fill and a 7 px red stroke with Round Cap. Let it bend slightly outward near the bottom.
- Copy that fringe path into a row of nine paths with their top anchors about 9 px apart. Keep the tops at the same height, and vary the lower anchors to make a soft curved hem. The middle strand ends near y 802; the outer strands end near y 789.
- Place the binding above the fringe using Object → Arrange → Bring to Front. Select bead, short connector, binding and fringe, then choose Object → Group. Rename the group Tassel in Layers.
- Select that complete tassel group. In Align, use Align to Artboard → Horizontal Align Center. Move it vertically until the bead meets the connector.
Use Window → Transform if you want to enter exact positions and sizes. The top-left artboard corner is the coordinate origin for the supplied 600 × 900 px SVG. Check the reference point in the Transform panel before entering a center or corner coordinate.
06. Save the working file, then export both formats.
First save your .ai document. Keep a generous margin around the hanging loop and tassel tips, then choose View → Show Transparency Grid to check the empty background and crossing gaps.
SVG for a scalable illustration
- Choose File → Export → Export As.
- Choose SVG as the format and select Use Artboards for the 600 × 900 canvas.
- Keep enough decimal precision for the curves; 3 decimal places is a useful starting point for this drawing. For recognizable part names, choose Object IDs: Layer Names.
- Export, then open the SVG in a browser and inspect the crossings and tassel at several sizes. Keep the .ai file for continued Illustrator work.
PNG for a card or social post
- Choose File → Export → Export As.
- Choose PNG and select Use Artboards.
- In PNG options, choose Background Color: Transparent. For a screen image at the document’s pixel size, use 72 ppi; increase the resolution when you need a larger raster output.
- Open the PNG and place it on both a light and a dark background. Check for cropped fringe tips, unexpected white patches and blurred crossings.
The SVG keeps the artwork as paths; the PNG is a pixel image. A transparent PNG is convenient to place on a finished card, while the SVG lets you continue selecting and changing individual parts.
Before you finish
- Each crossing has one continuous top cord and two visible lower ends.
- The alternating order reverses on each adjacent row.
- The hanging loop, body and tassel share the same center line.
- The SVG opens cleanly and the PNG remains transparent around the drawing.
If a curve looks angular, select its anchor and adjust its direction handles. If a crossing looks fused, widen the gap in the lower path. If the whole ornament shifts during alignment, check that you selected the complete group.
Try the composition in another way.
Use Plan an ornament to decide on shape, proportion and colors before refining your vector drawing. Our DIY designer is a quicker way to arrange existing knot pieces and add a greeting in your browser. Illustrator gives you direct control over anchors, cord paths and your own drawn details.
For a physical ornament, continue with a basic knot lesson and a handmade tassel.