
Chinese Knot
Two-Return Pan Chang Knot
Lay out the two routes of a small Pan Chang knot on a pin board. The pink and yellow demonstration makes the returning strands easy to follow, then shows the full process of closing the woven centre and setting the outer loops.
二回盘长结
23:21 in total. Parts continue in order. Use English subtitles to switch captions on or off.
Follow the making process.
These checkpoints come from the demonstration. Replay the movement before tightening a hidden crossing.
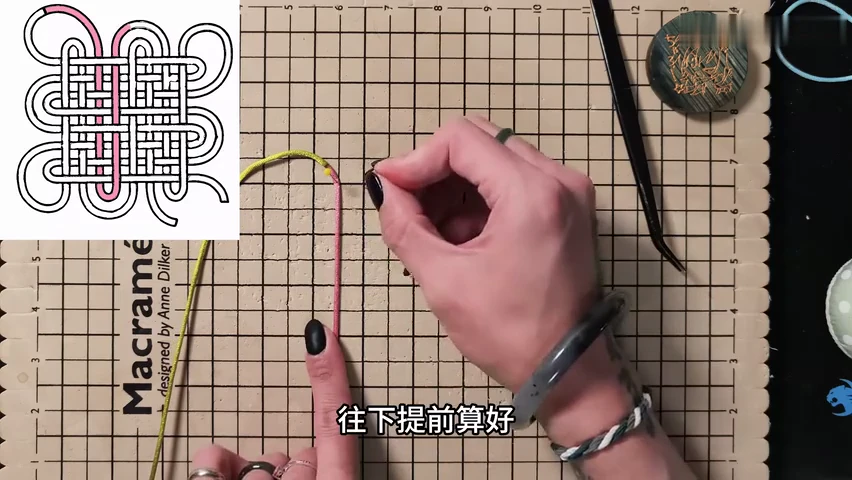
01. Pin the starting point
Fix the middle of the cord to the board. Spread the working lengths to either side before laying the first long fold.
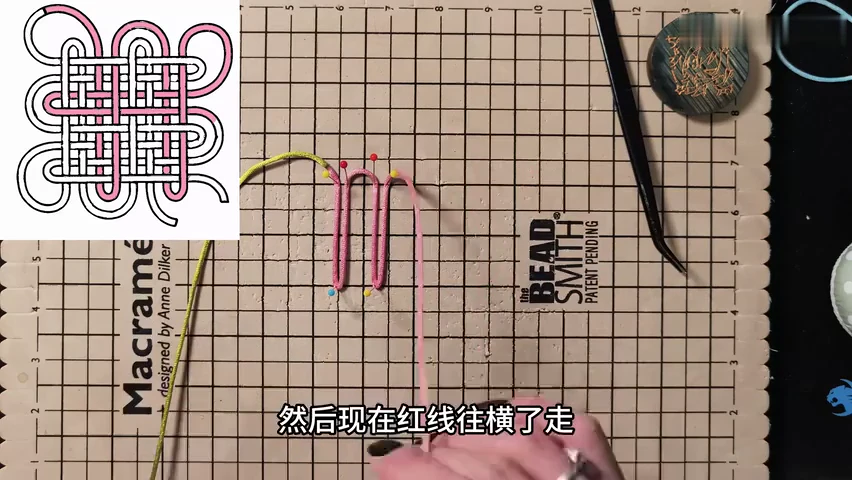
02. Lay the two long vertical folds
Arrange the first route into two open vertical loops. Pin their turns so the four straight strands remain parallel.
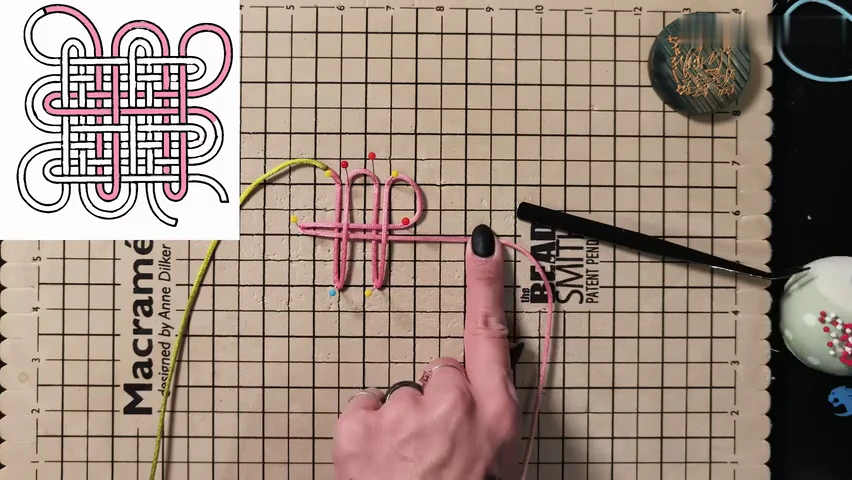
03. Turn the first route across the folds
Bring the pink working end horizontally across the pinned vertical strands. Leave the new side loop open and follow its return in the highlighted diagram.
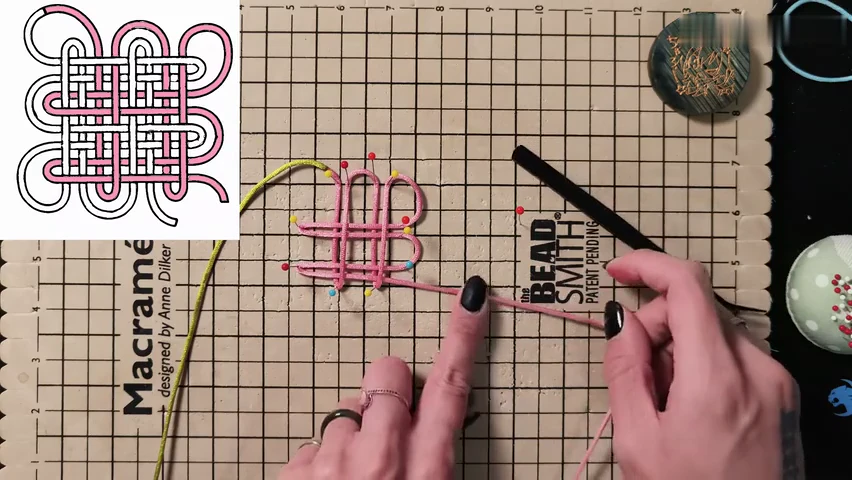
04. Complete the pink route
Finish the second horizontal return. Compare the loose pink lattice with the red-highlighted route before bringing in the other end.
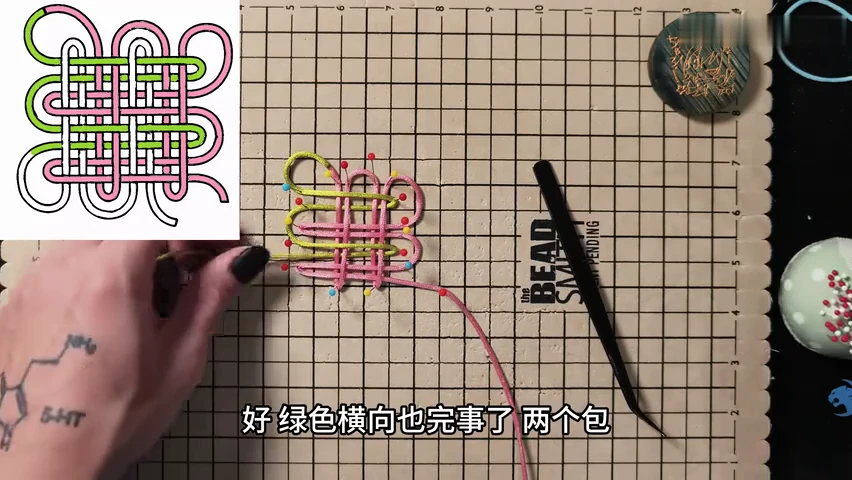
05. Add the yellow horizontal returns
Work the yellow end through the existing arrangement. Complete its two horizontal wrapping passages while the pins keep the pink route separated.
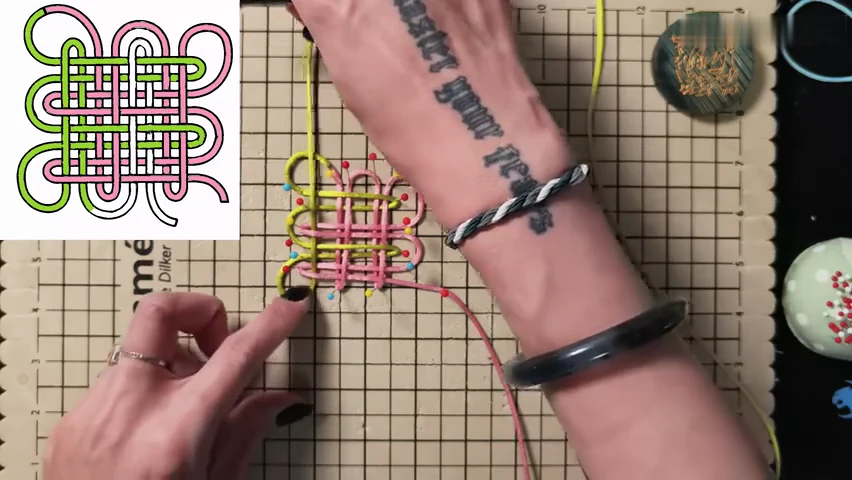
06. Weave the yellow vertical return
Turn the yellow end upward through the pink crossings along the green-highlighted path. Keep each entry visible with the pointed tool.
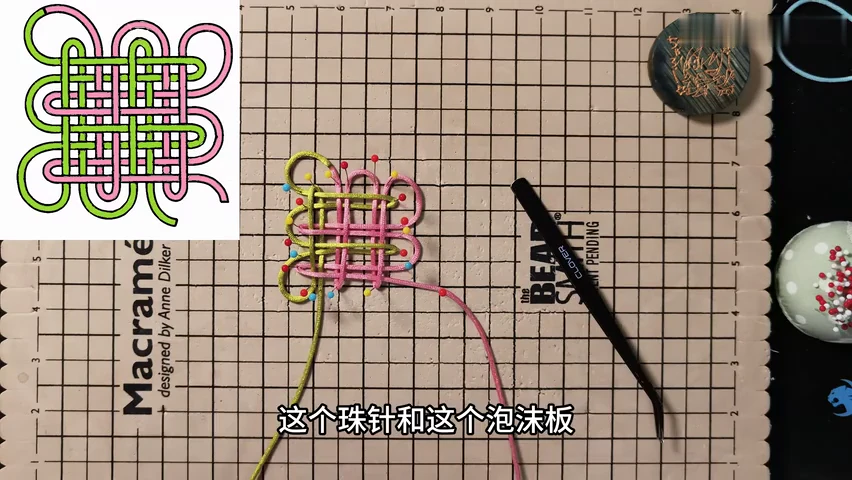
07. Inspect both routes on the board
Check the complete pink-and-yellow lattice against the diagram. The outer folds should still be loose enough to separate and trace.
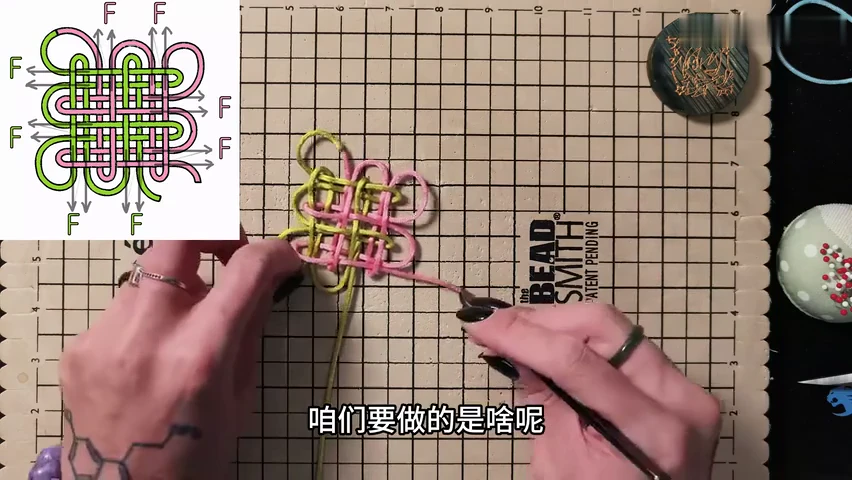
08. Release the pins and open the loops
Remove the supports while holding the centre. Pull the indicated outer folds outward in small amounts to begin closing the inner crossings.
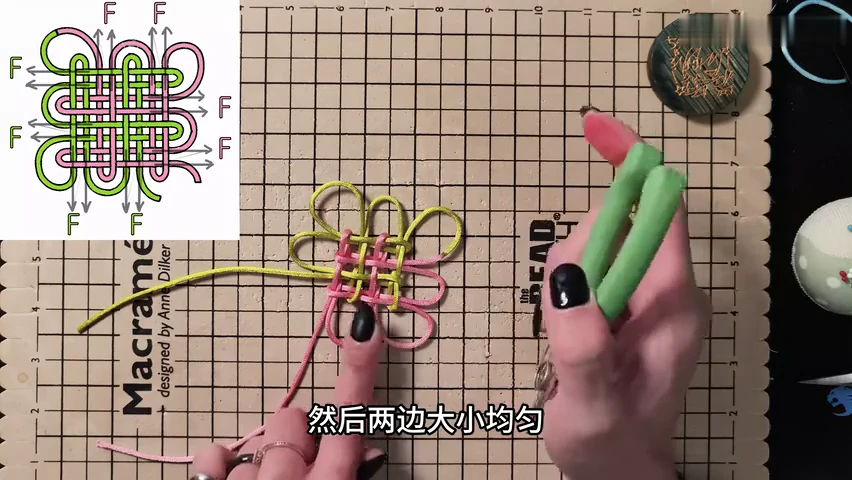
09. Balance the broad side loops
Keep opposite loops at a similar size as you draw slack outward. Support the centre with a finger while using the pliers.
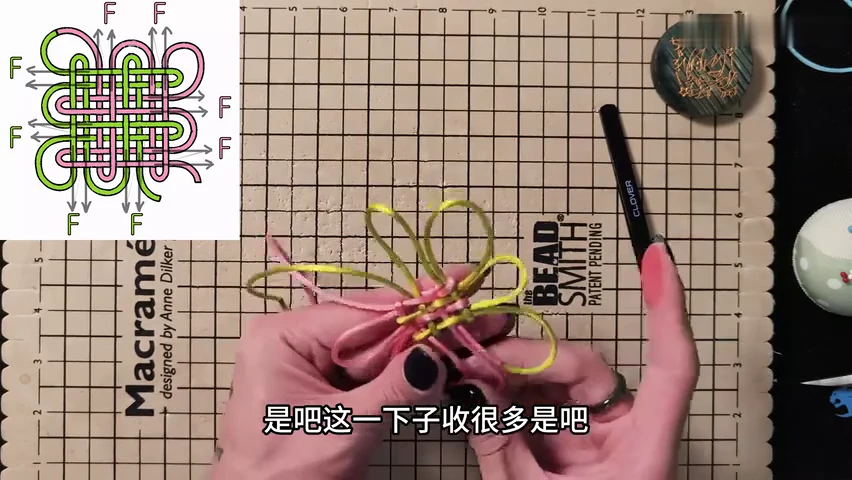
10. Close the woven centre
Lift the knot from the board. Work slack out of the middle gradually, keeping the temporary loops available for the next adjustment.
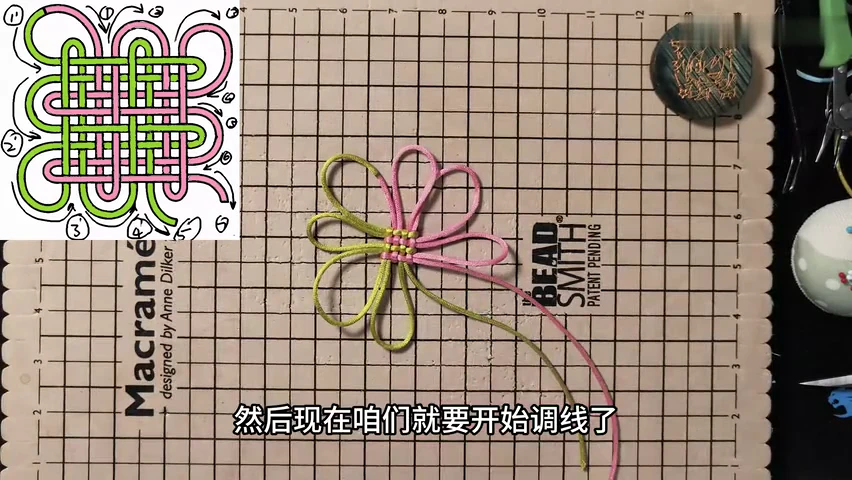
11. Start the numbered dressing sequence
Follow the numbered cord route in the diagram. Move slack from the first oversized ear into the next passage rather than pulling only the free ends.
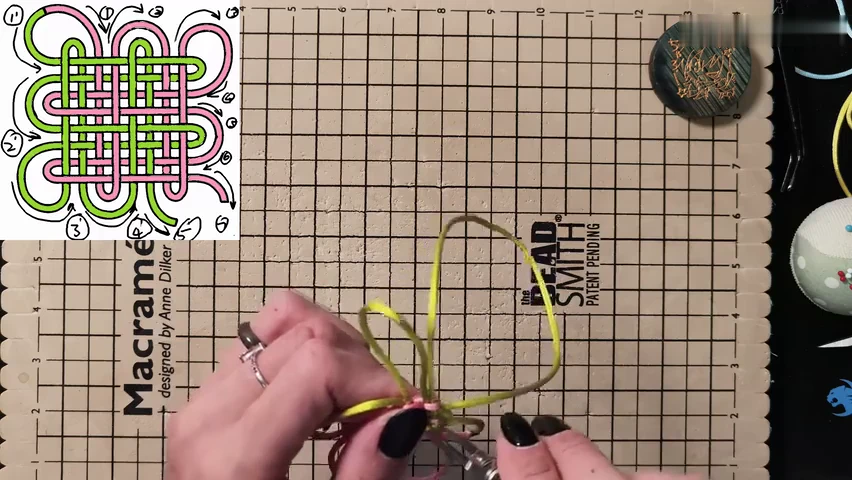
12. Reduce the next oversized ear
Draw the transferred slack through the neighbouring loop. Continue along the same cord, checking the woven face after each small adjustment.
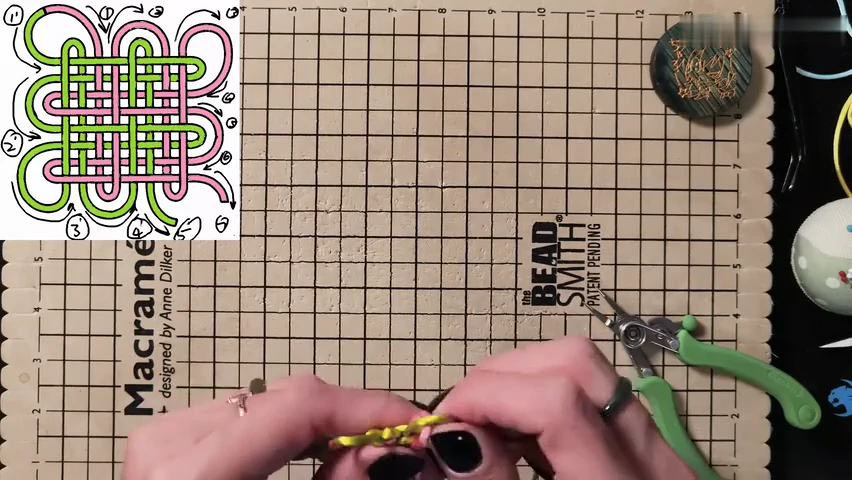
13. Set the small outer ears
Reduce the remaining long loops to the final ear size. Keep enough slack for the centre to lie flat and for the paired strands to sit evenly.
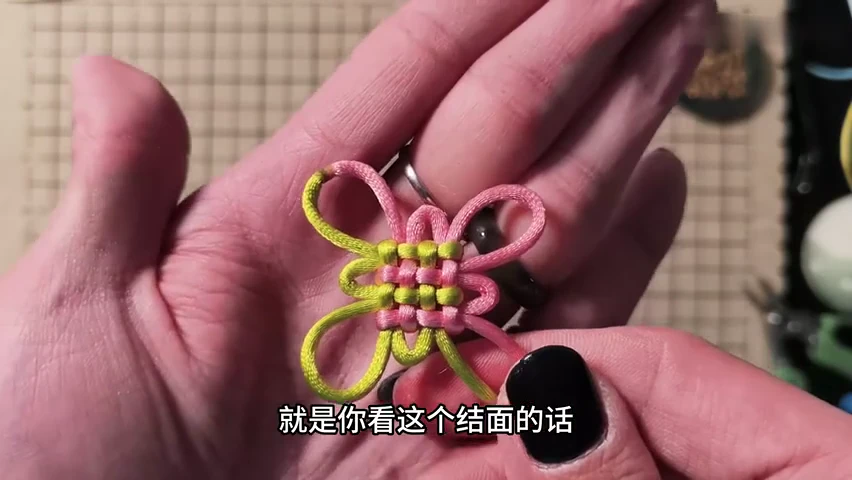
14. Inspect the finished square face
Balance the four main outer loops around the compact woven centre and separate the two working ends.
Check your finished piece
- The centre is a compact, flat woven square.
- Four main outer loops remain around the centre.
- The paired strands sit evenly, with no large temporary slack loop.