
Chinese Knot
Qing Knot
Build a stepped woven face with a longer lower section on the pin board. The grey and gold routes remain open for inspection before the knot is lifted, tightened and dressed into its cornered outline.
磬结
37:42 in total. Parts continue in order. Use English subtitles to switch captions on or off.
Follow the making process.
These checkpoints come from the demonstration. Replay the movement before tightening a hidden crossing.
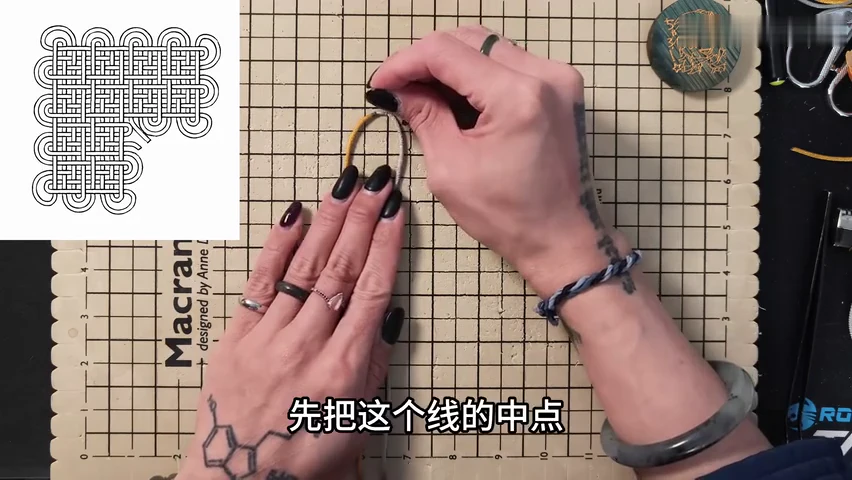
01. Fix the middle of the cord
Pin the midpoint and spread the grey and gold working lengths to either side. Leave the folds loose enough to arrange on the grid.
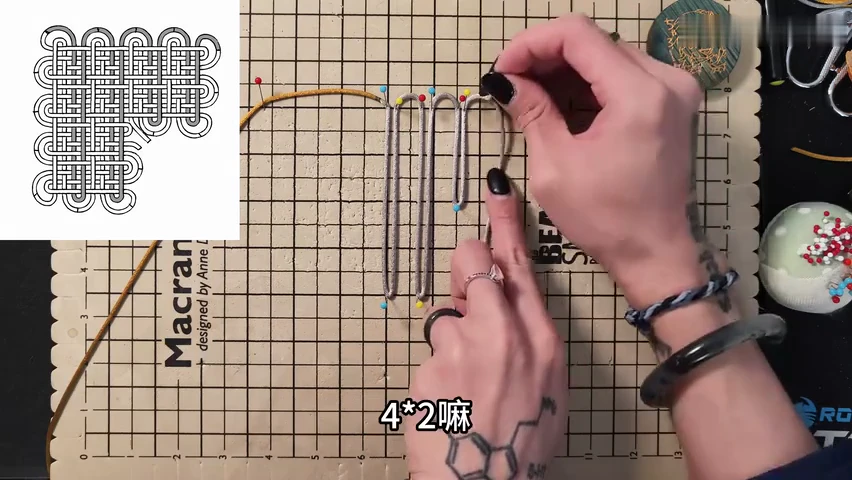
02. Build the stepped vertical layout
Pin the grey vertical folds shown in the diagram. Keep the longer lower strands separate from the shorter upper folds.
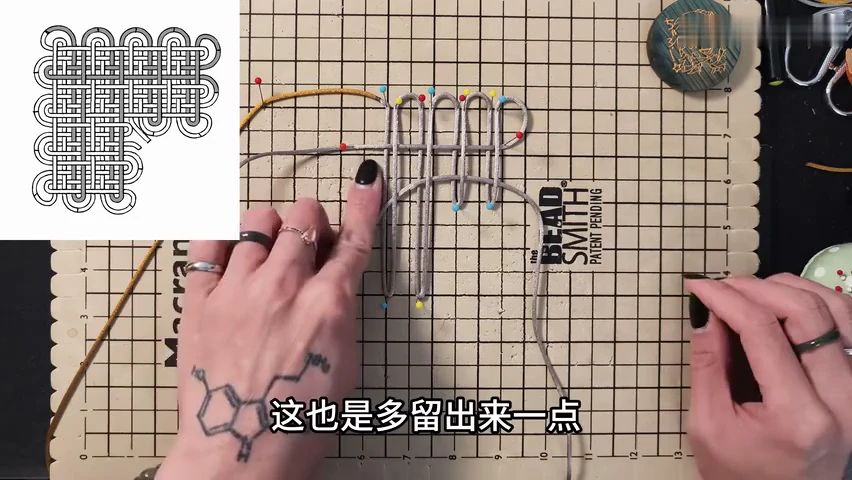
03. Complete the first loose lattice
Finish the grey crossing route across the vertical folds. Keep the extra lower length open; it becomes part of the projecting section.
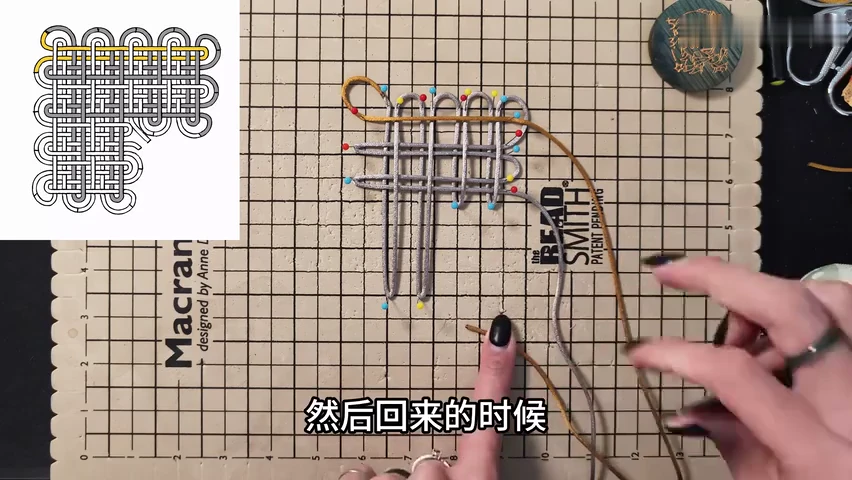
04. Start the gold horizontal return
Bring the gold end across the upper lattice and return it through the pinned crossings. Keep the new side fold open.
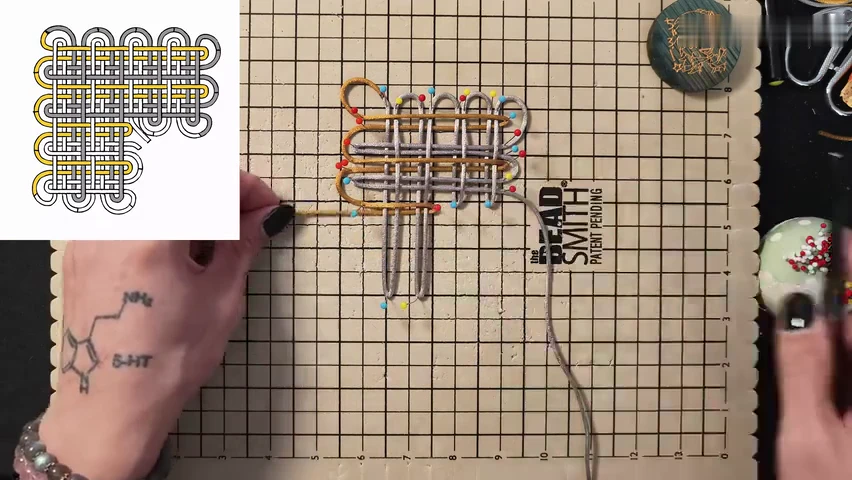
05. Extend the gold route downward
Continue the gold passages into the longer lower section. Check the turns against the stepped diagram before changing direction.
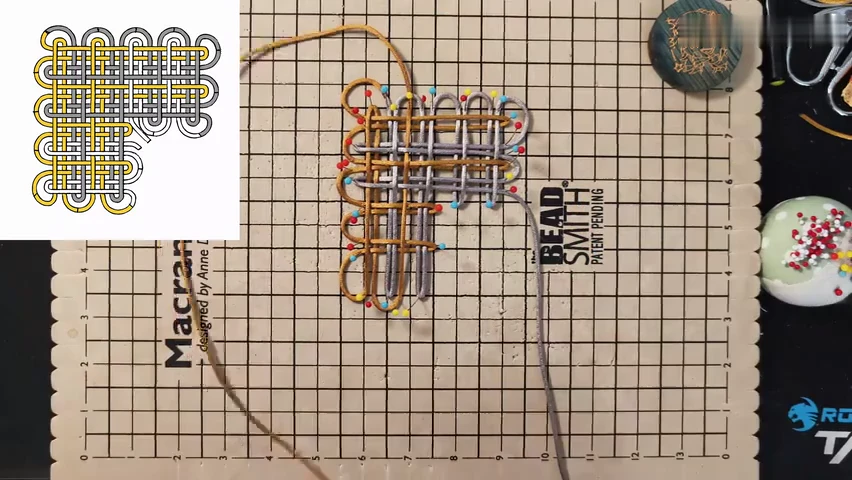
06. Bring the gold route back through the centre
Work the returning end through the upper and lower crossings. Use the pointed tool to open the intended passage without disturbing adjacent folds.
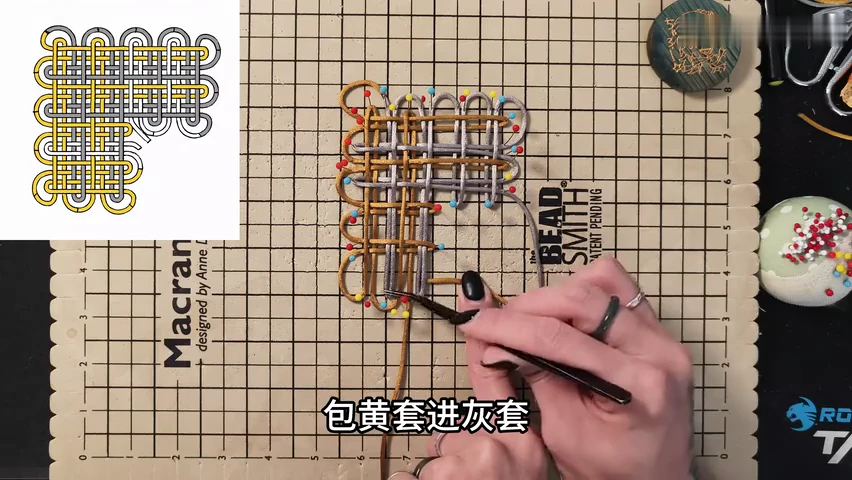
07. Place the lower interlacing pass
Feed the next gold loop into the indicated grey loop. Keep the lower rows open so you can inspect their crossings.
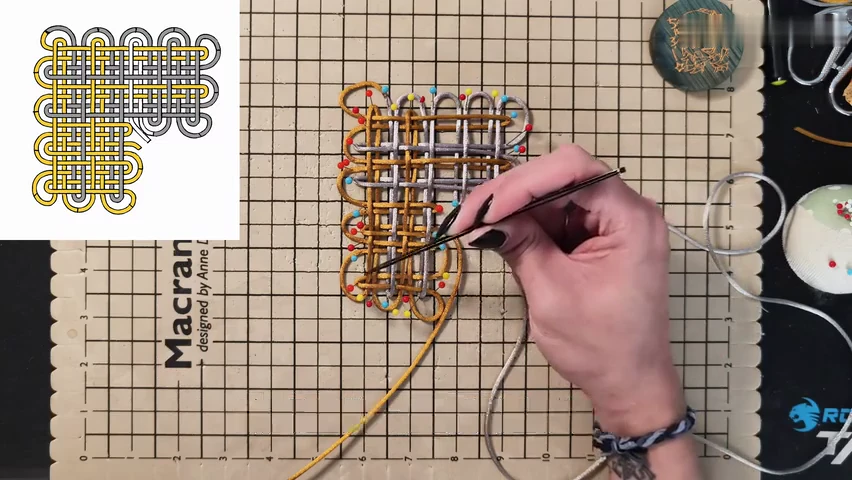
08. Complete the return path
Bring the remaining gold end back through the lower lattice along the highlighted route. Leave both ends accessible below the arrangement.
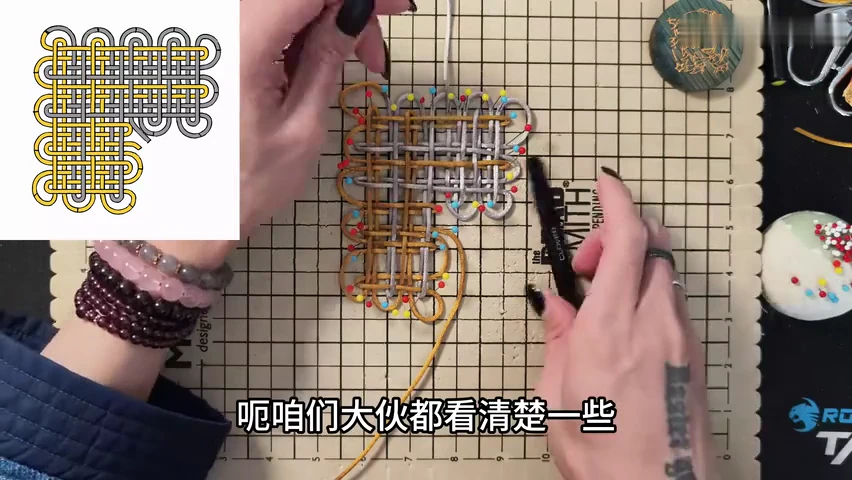
09. Check the complete pinned structure
Trace the two routes before removing the pins. Compare the stepped outline and its open outer folds with the complete diagram.
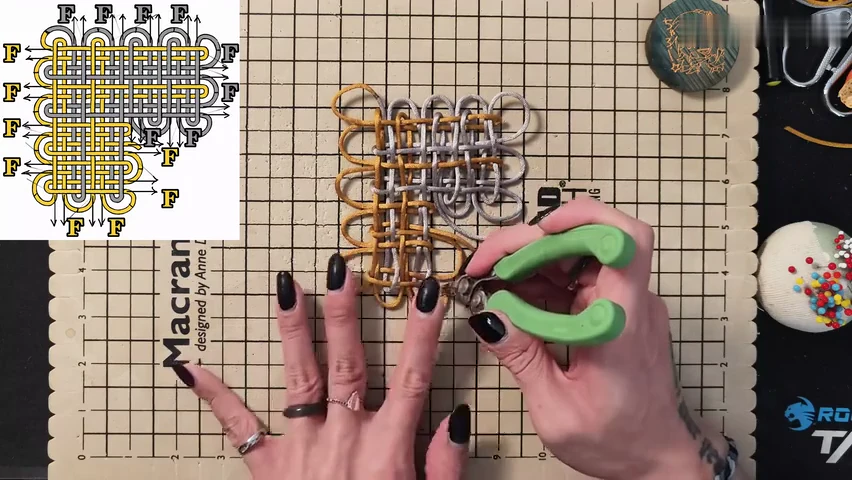
10. Release and enlarge the outer folds
Remove the supports and draw the indicated folds outward with the pliers. Hold the centre down so the interlacing stays in place.
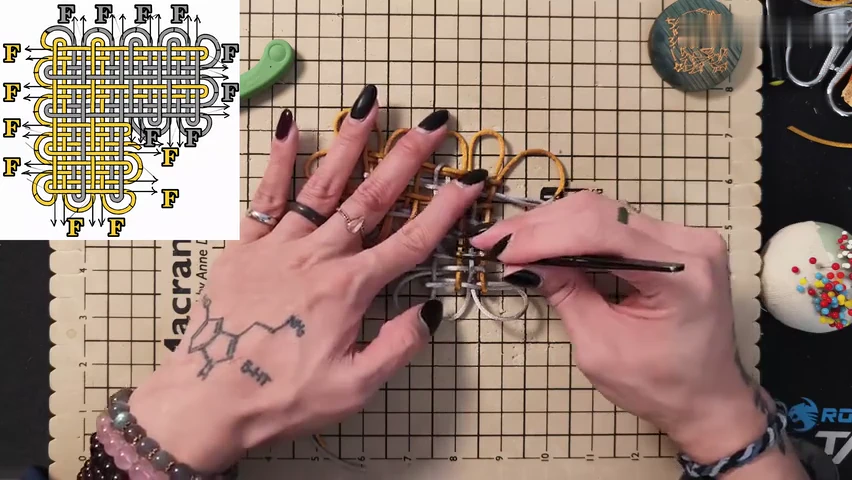
11. Lift the knot and begin closing it
Support the woven face between your fingers. Transfer loose cord out of the centre while retaining the large outer ears.
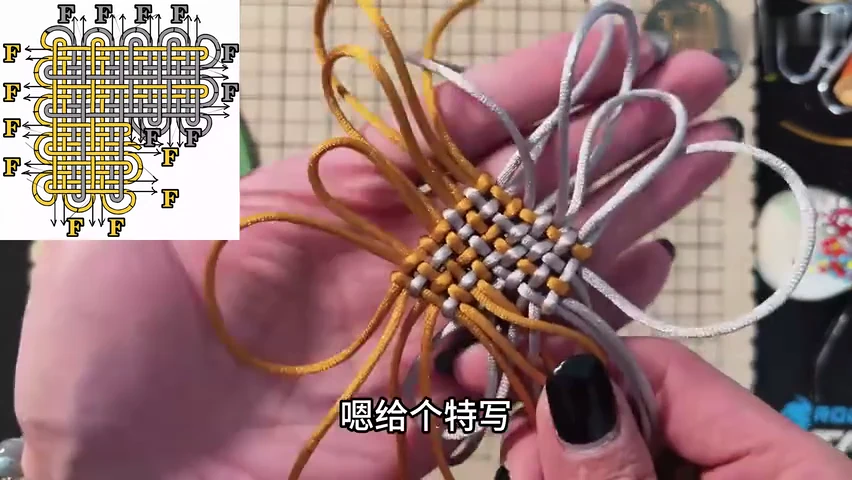
12. Inspect the emerging face
Check the compacting woven face in the close-up. Keep its upper area and projecting lower section aligned before reducing the temporary loops.
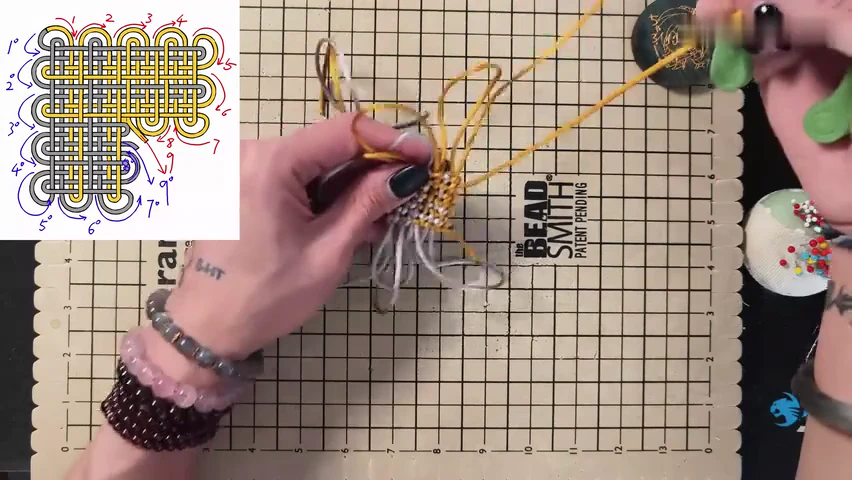
13. Follow the dressing route
Use the numbered diagram to transfer excess cord from one loop to the next. Work along the continuous route rather than tightening one side in isolation.
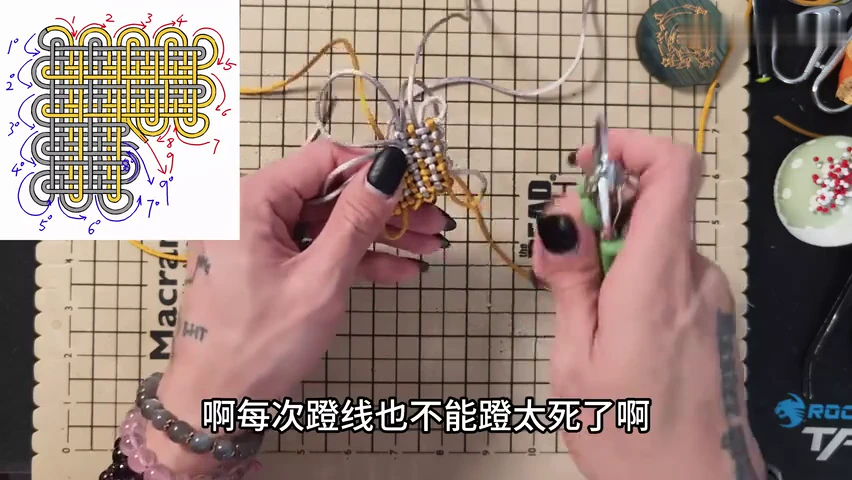
14. Make the final small adjustments
Reduce the remaining oversized folds gradually. Avoid pulling any passage so tight that the woven face bends out of position.
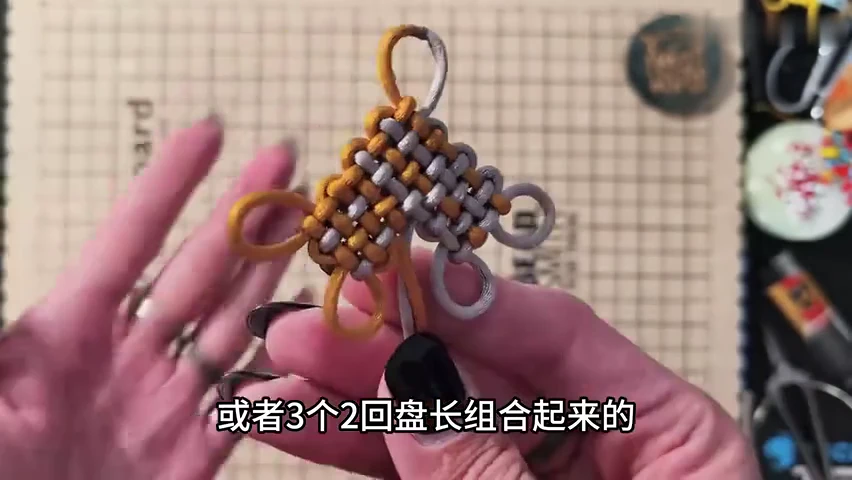
15. Check the cornered outline
Compare the completed face with the close-up. Balance the small outer ears and ease the woven strands into a flat, orderly outline.
Check your finished piece
- The woven face retains the upper area and projecting lower section shown in the final close-up.
- The small outer ears are distinct and reasonably balanced.
- The face lies flat without a large loose strand crossing it.