
Chinese Knot
Sash Knot
Make a compact Sash knot with two rounded side loops. The first sequence uses one colour; the second keeps black and white routes distinct and shows the longer loop and complete dressing process.
御守结 / 绶带结
20:08 in total. Parts continue in order. Use English subtitles to switch captions on or off.
Follow the making process.
These checkpoints come from the demonstration. Replay the movement before tightening a hidden crossing.
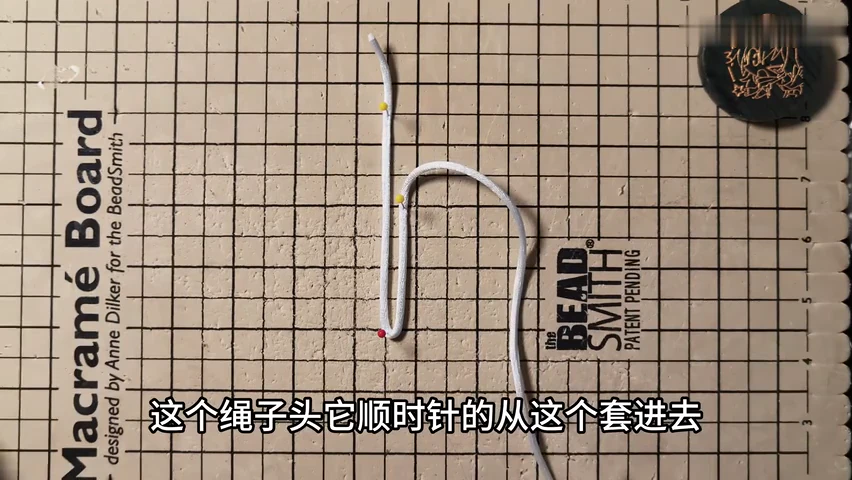
01. Lay the first open side loop
Pin the initial white fold and its return. Keep the upright strands parallel and the rounded side loop open.
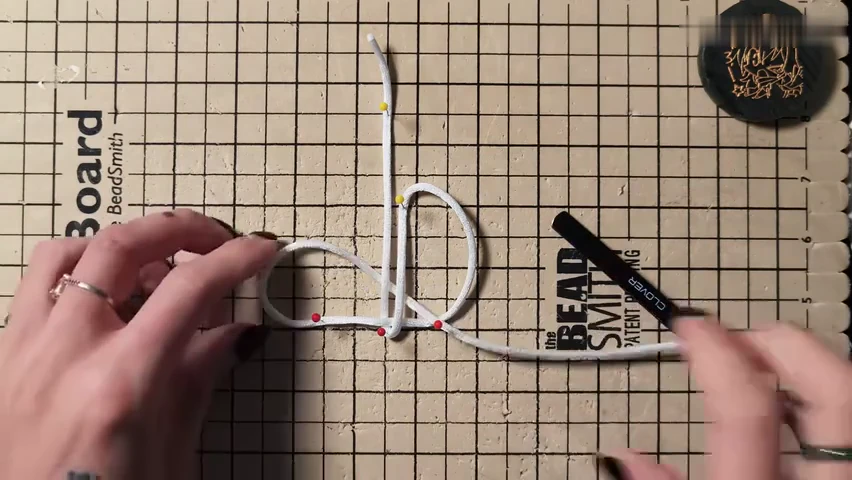
02. Cross the centre and add the opposite loop
Bring the working length across the central strands. Form the opposite side loop while keeping the small centre supported by pins.
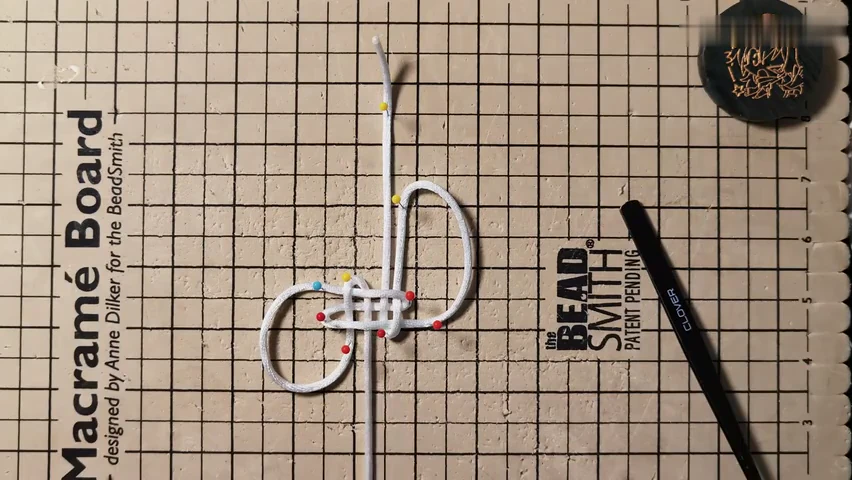
03. Inspect the loose one-colour route
Check the small lattice between the two large loops. Keep both free ends separate before lifting the arrangement.
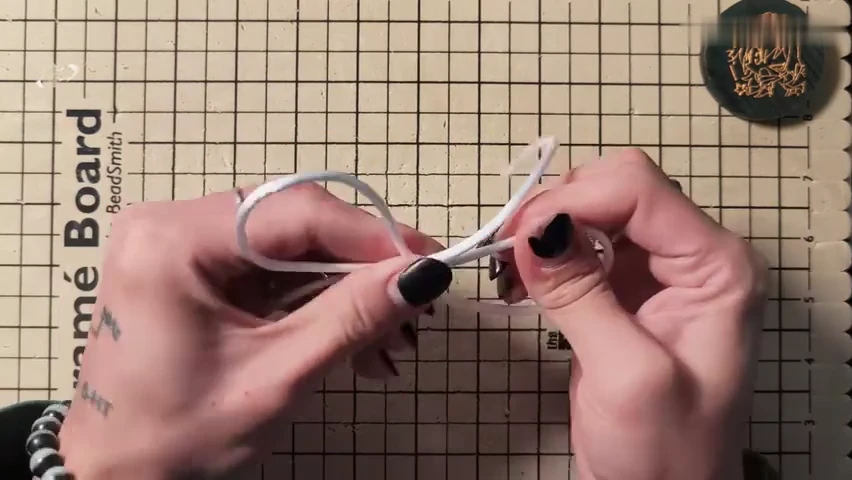
04. Lift and close the first sample
Remove the pins and hold the centre between your fingers. Draw slack through in small amounts without closing the two outer loops.
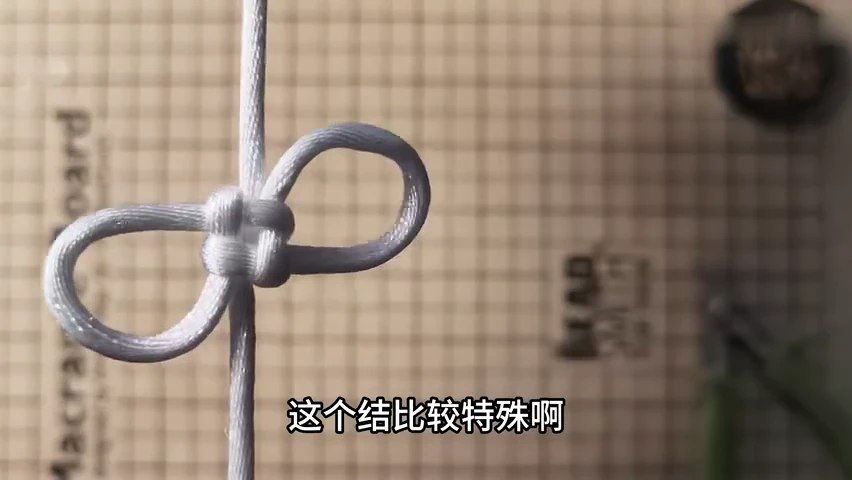
05. Check the plain Sash knot
Balance the two rounded ears on either side of the compact centre. This gives a reference shape before the two-colour version.
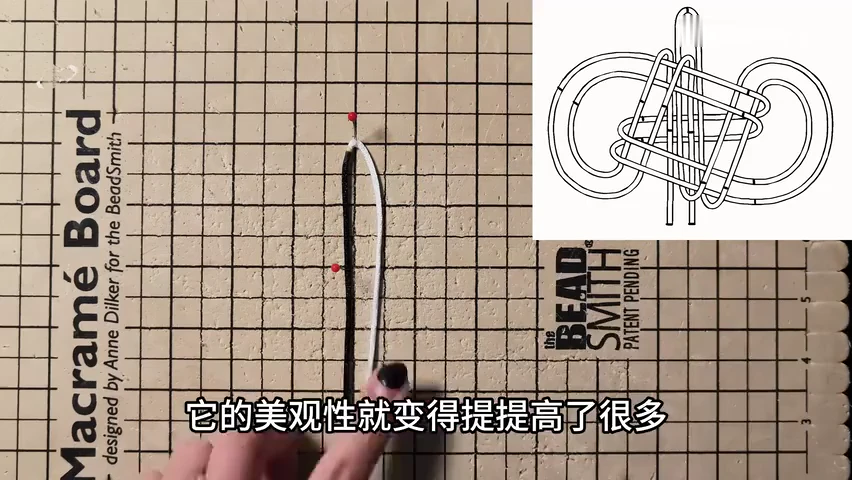
06. Pin the two-colour starting fold
Arrange the black and white strands along the long upright fold. Keep the route diagram visible while preparing the side passages.
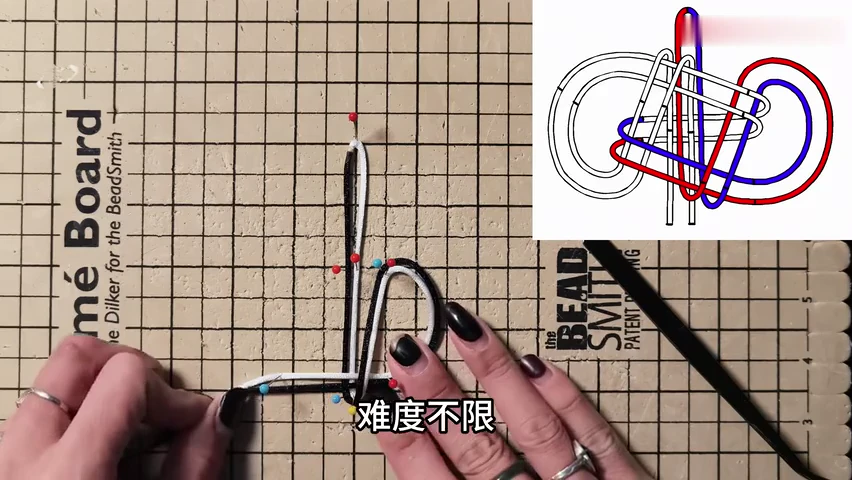
07. Build the first two-colour side loop
Follow the red and blue highlighted routes around the first side. Hold the parallel black and white passages open with the pins.
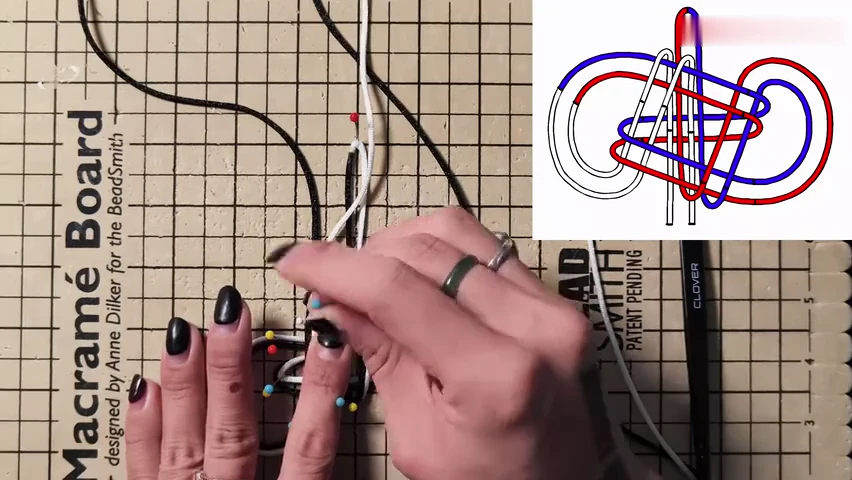
08. Return through the opposite side
Continue the two colours through the centre and around the opposite loop. Check their positions against the completed route diagram.
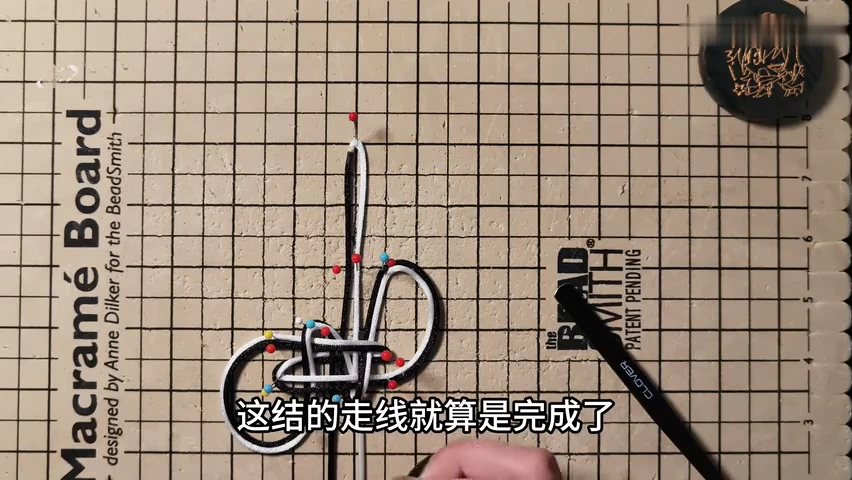
09. Check the finished loose route
Compare the long upper fold, paired side loops and interlaced centre with the diagram. Remove supports only after the path is complete.
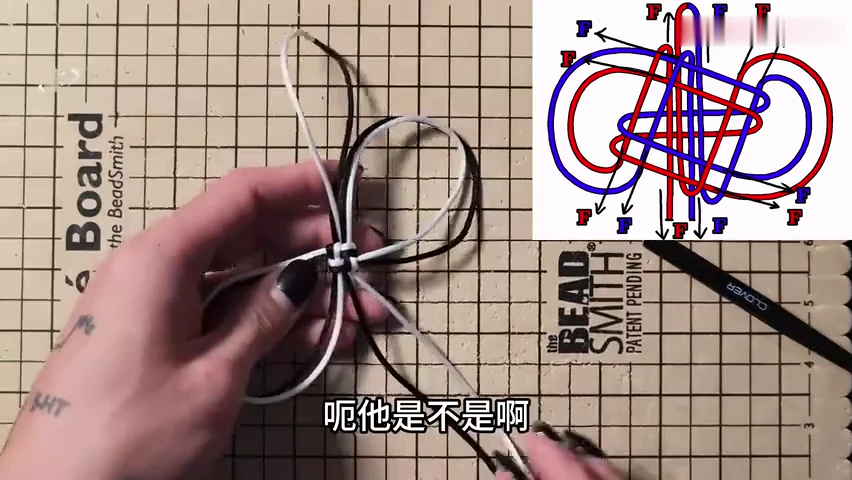
10. Begin closing the paired routes
Lift the knot and support the centre. Draw the indicated folds outward to take slack from the middle.
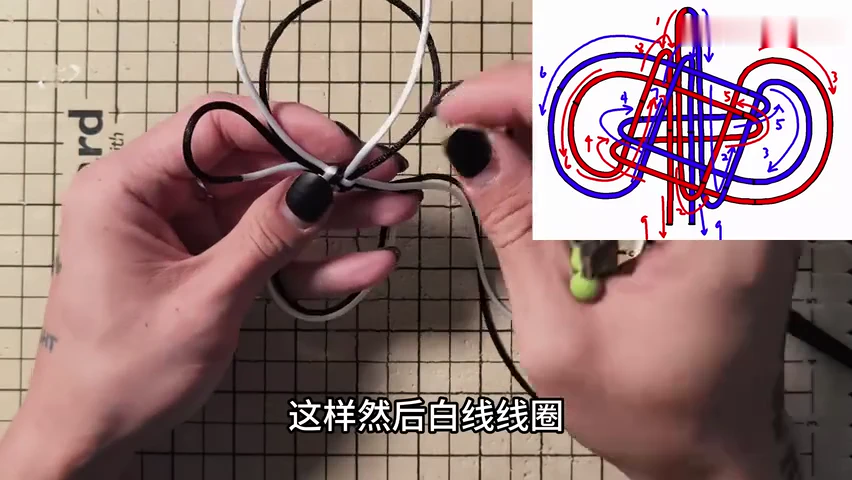
11. Follow each colour through the centre
Trace black and white separately while passing excess cord into the next loop. Keep the neighbouring colour in place as you adjust.
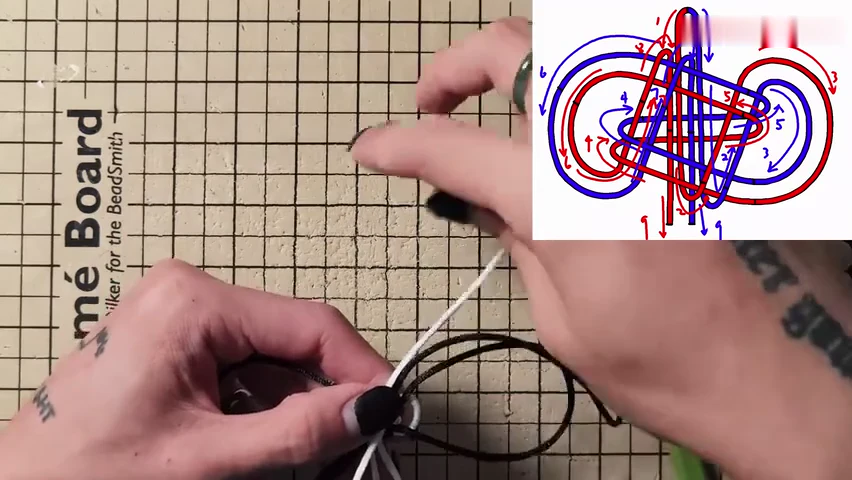
12. Reduce the oversized loops
Continue the numbered dressing sequence until the large temporary folds shrink. Keep the upper loop and two side ears distinct.
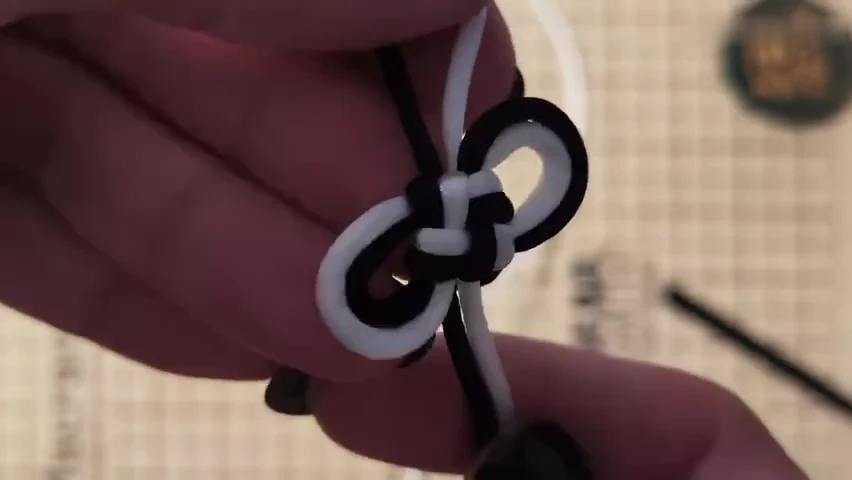
13. Balance the two-colour face
Straighten the paired strands around the compact centre. Match the rounded side ears and preserve the longer standing loop.
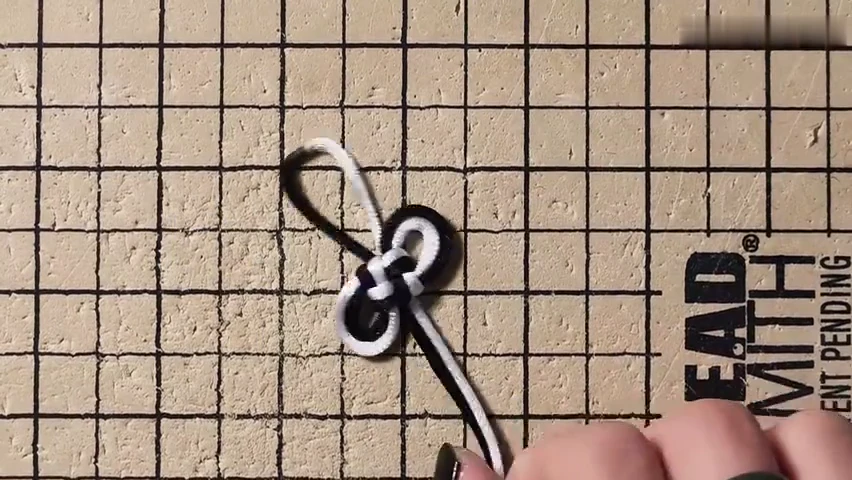
14. Set the final outline
Lay the knot flat and check the centre, long loop and free ends. Make small adjustments until the two colours sit evenly.
Check your finished piece
- The one-colour sample has two balanced rounded side loops.
- The two-colour sample retains the long upper loop and two side ears.
- The compact centre holds its interlacing without a large loose strand.