
Chinese Knot
Rhombus and Tuan Jin Combination
Weave an open Pan Chang frame, then add a white eight-loop hollow Tuan Jin inside it. The two structures stay loose together until the inner ring is closed and the frame is dressed around it.
回菱盘长与八耳空心团锦(组合结)
19:56 in total. Parts continue in order. Use English subtitles to switch captions on or off.
Follow the making process.
These checkpoints come from the demonstration. Replay the movement before tightening a hidden crossing.
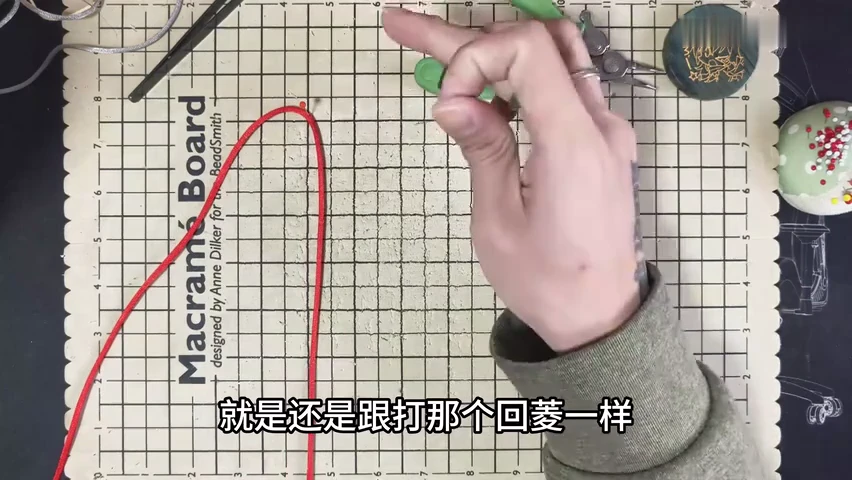
01. Pin the start of the open frame
Fix the red cord near its middle and spread the long ends. Keep a broad empty working area for the central opening.
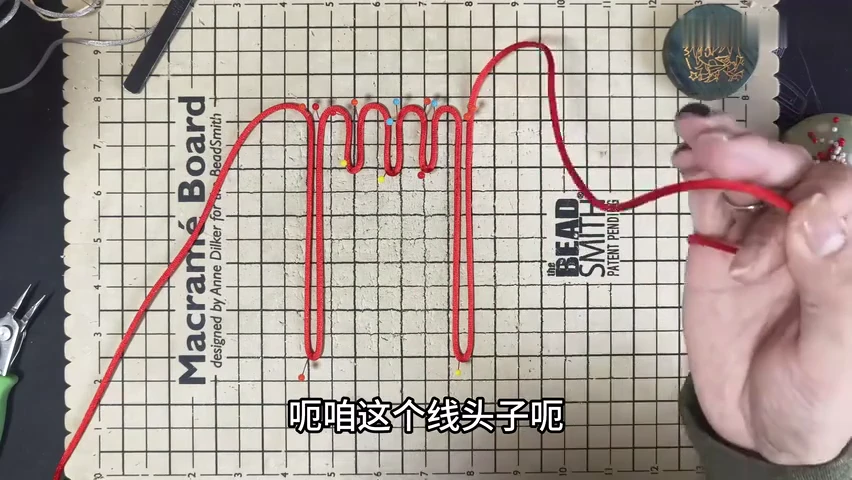
02. Lay the upper frame folds
Arrange the upright red folds across the upper edge. Leave the two long side strands separate from the shorter upper folds.
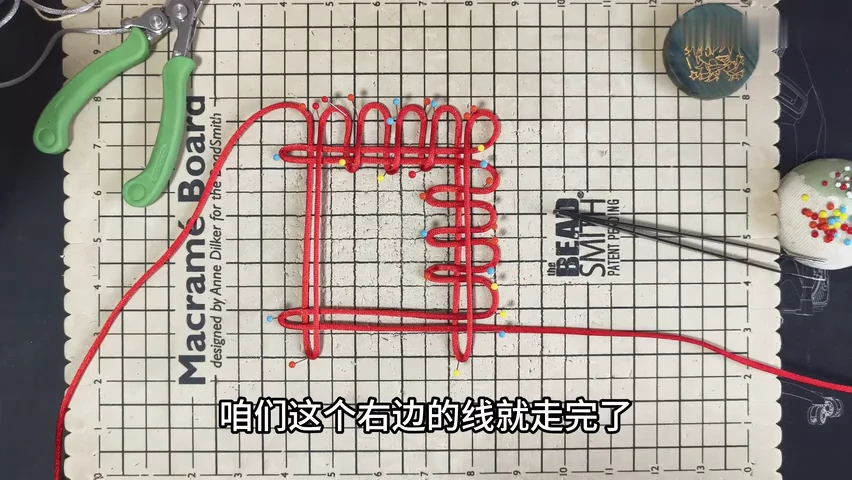
03. Turn the route down the side
Continue the red layout along the side of the opening. Pin each outer turn to keep the frame width and central gap visible.
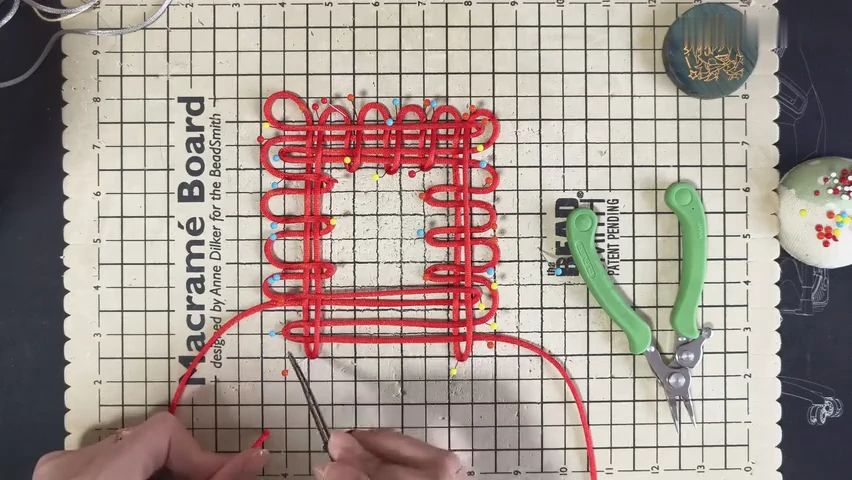
04. Continue around the remaining edges
Work the repeated folds around the lower and opposite sides. Keep the central opening clear as the route returns toward the starting edge.
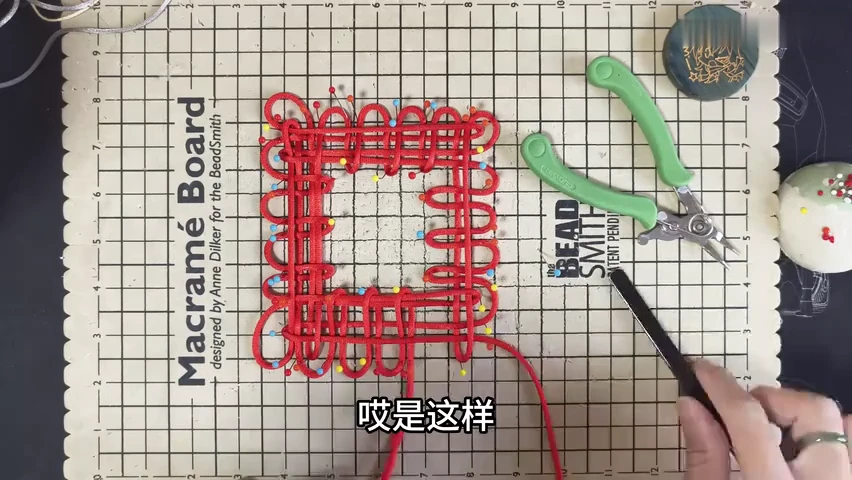
05. Complete the loose red frame
Inspect the full pinned frame and its returning crossings. Leave its inner openings loose for the white cord to pass through.
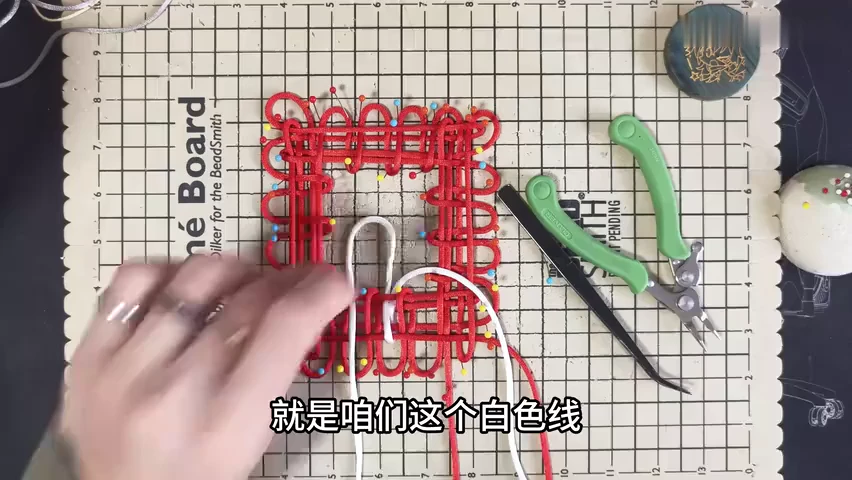
06. Start the white inner knot
Bring the white cord into the central space and establish its first long fold. Keep the red frame pinned while the inner route is added.
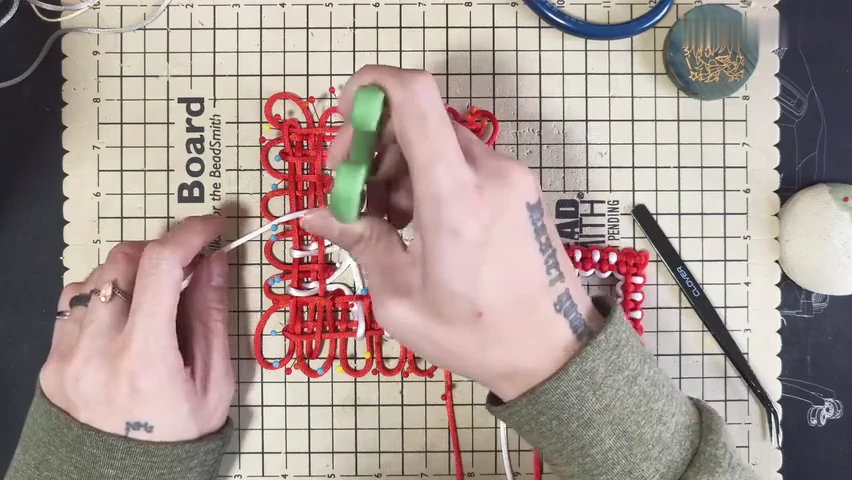
07. Work the white loops into the frame
Continue the hollow Tuan Jin route through its loose crossings and the indicated frame openings. Keep the two structures separated with the pointed tool.
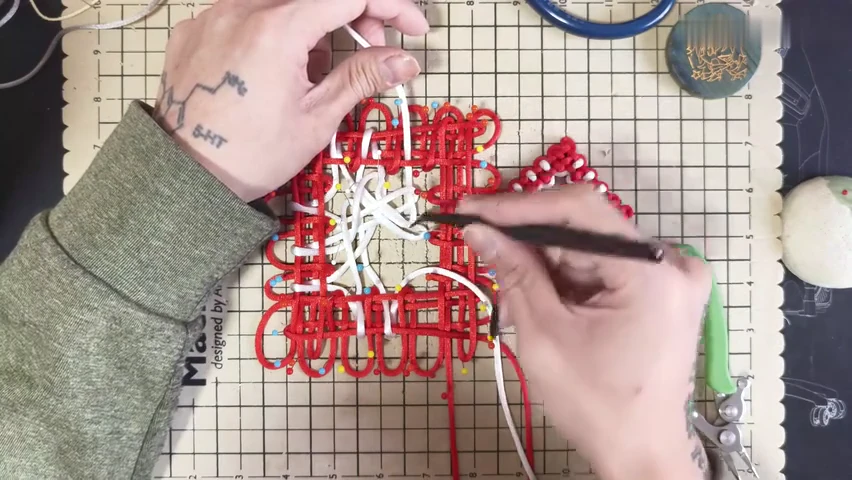
08. Build the remaining inner crossings
Follow the white route around the centre. Compare how its developing ears join the red frame with the finished sample beside it.
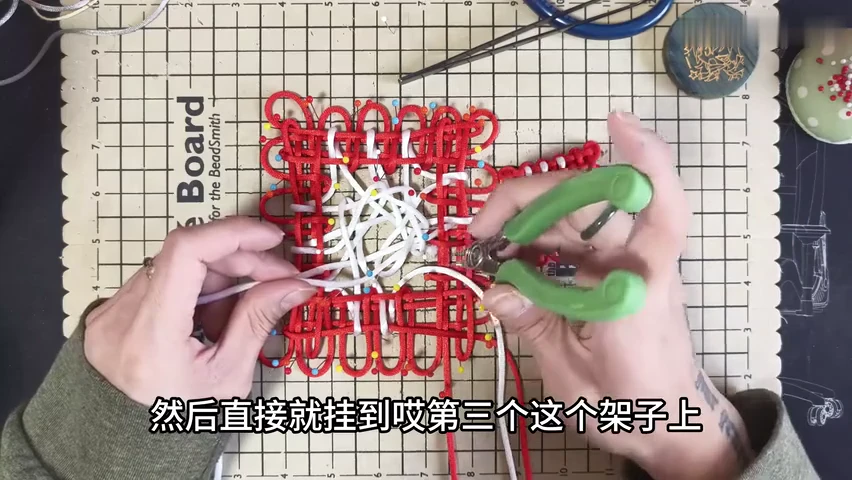
09. Complete the last inner attachment passages
Finish the remaining white returns and their connections to the frame. Keep the eight-loop inner structure loose enough to inspect before tightening.
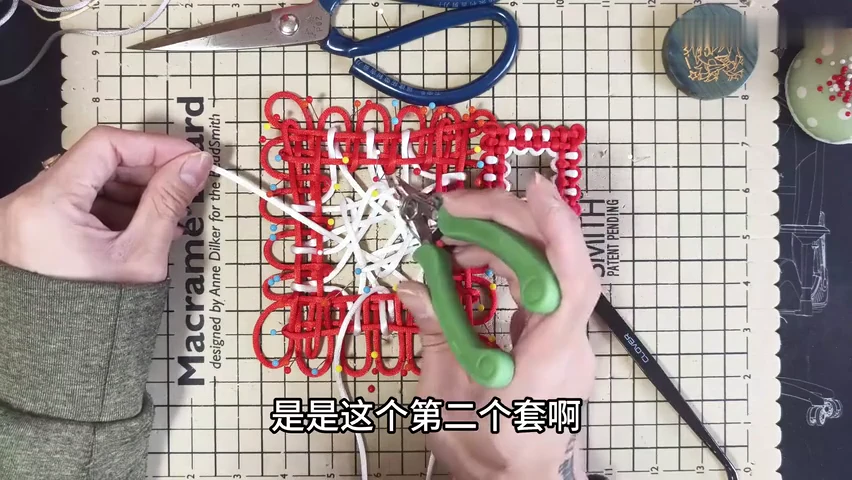
10. Check the full combined route
Trace the red frame and white inner arrangement while both are supported. Check the joined openings before lifting the work.
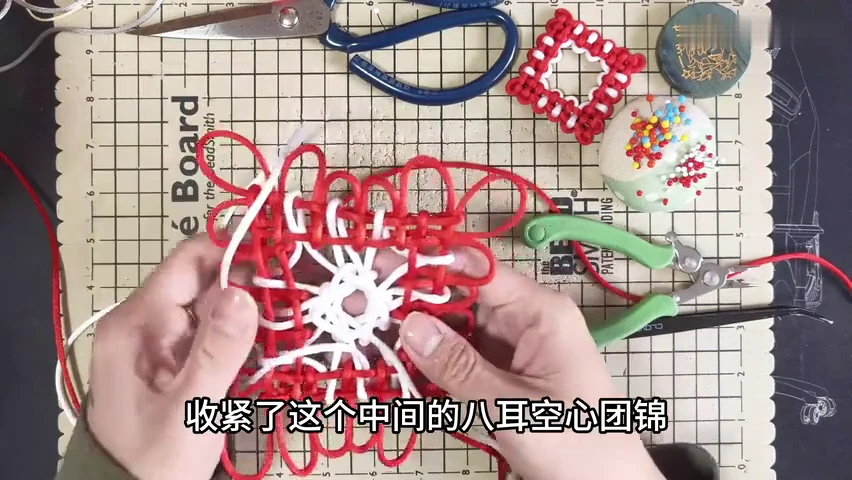
11. Close the hollow inner ring
Release the supports and hold the combined knot in your hand. Reduce the white centre first while preserving its open middle and connections to the frame.
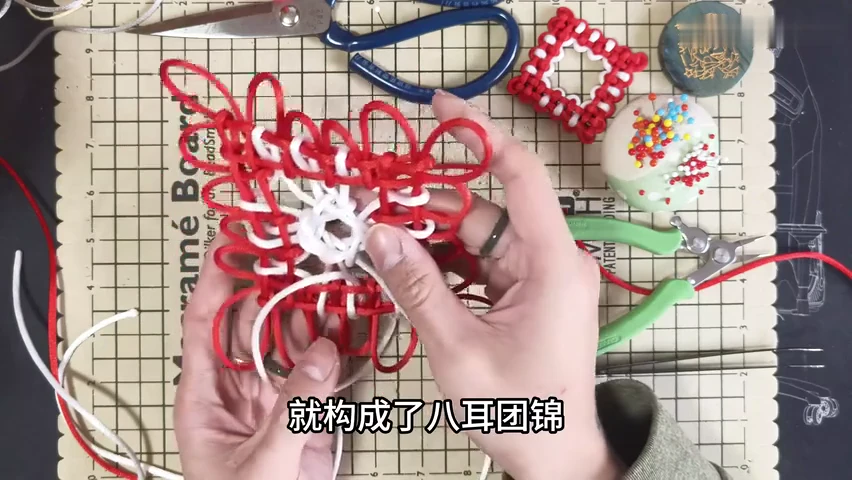
12. Dress the frame around the inner knot
Transfer the remaining red slack through the outer folds. Balance the frame while keeping the white ears visible between its inner edge and hollow ring.
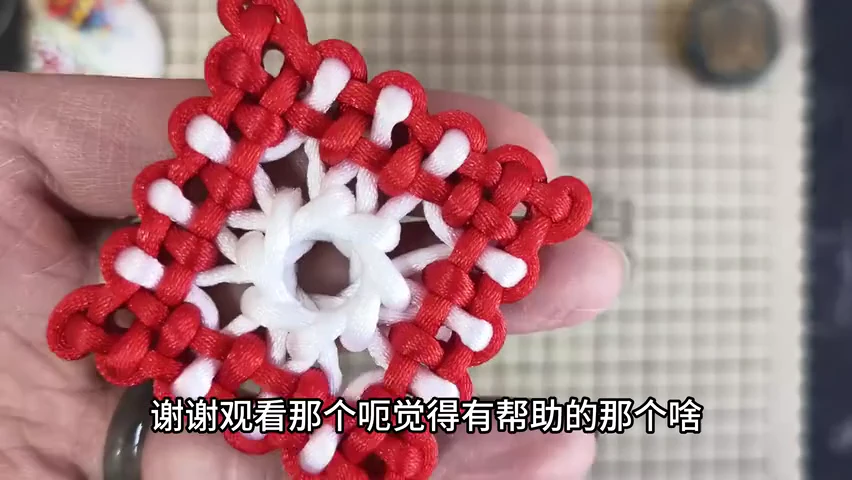
13. Inspect the complete framed knot
Hold the finished face toward you. Check the compact red frame, the white inner ring and the clear opening through its centre.
Check your finished piece
- The red frame is compact and evenly shaped around the centre.
- Eight white inner ears remain connected to the surrounding frame.
- The white centre keeps a clear opening, with no large temporary loop.