
Basic knots · Lesson 08 of 18
Chinese Button Knot
Tie a Chinese button knot with a real cord video and eight timed steps. Form the loose base, return both ends and tighten a compact rounded button.
纽扣结
The finished Chinese button knot
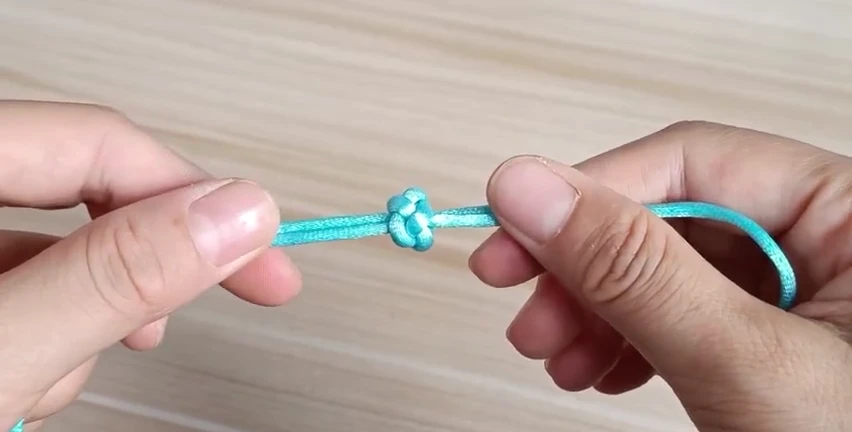
1:29 demonstration. Pause and repeat each movement at your own pace.
Follow the cord, step by step.
Each image comes from this demonstration. Tap its time to replay the movement.
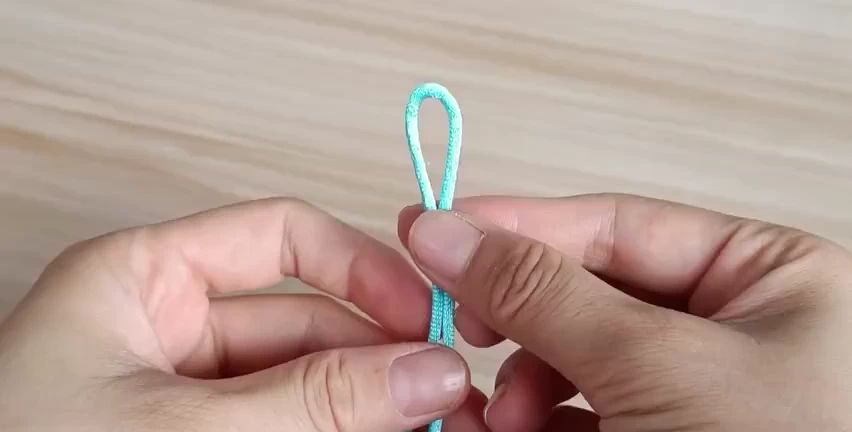
01. Start with a folded cord
Hold an upright loop and leave both long ends free below your fingers.
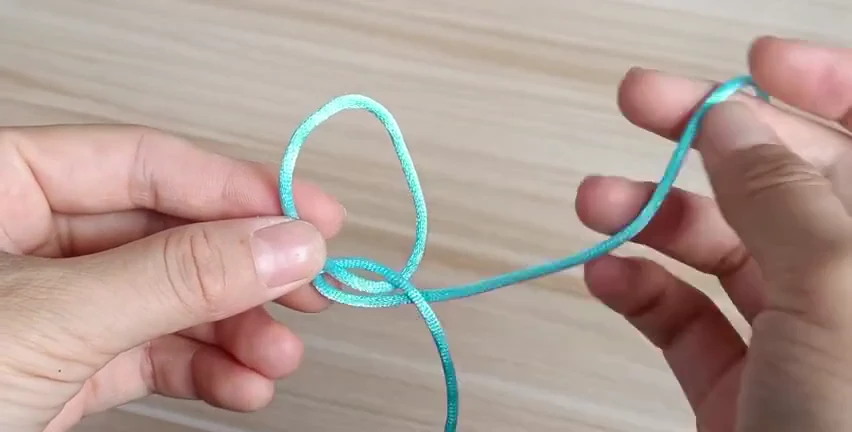
02. Form the first overlapping loops
Curve an end around the base of the upright loop. Keep the rounded lower opening visible.
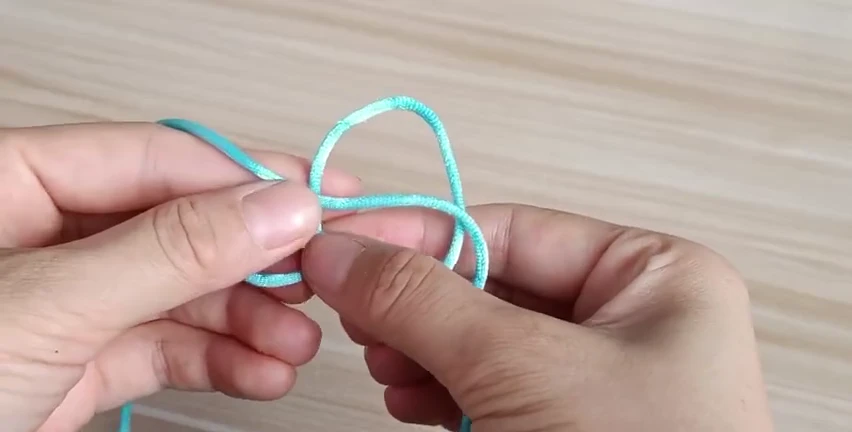
03. Weave the remaining end across
Bring the other end across the open loops. Match the visible crossings while keeping the base loose.
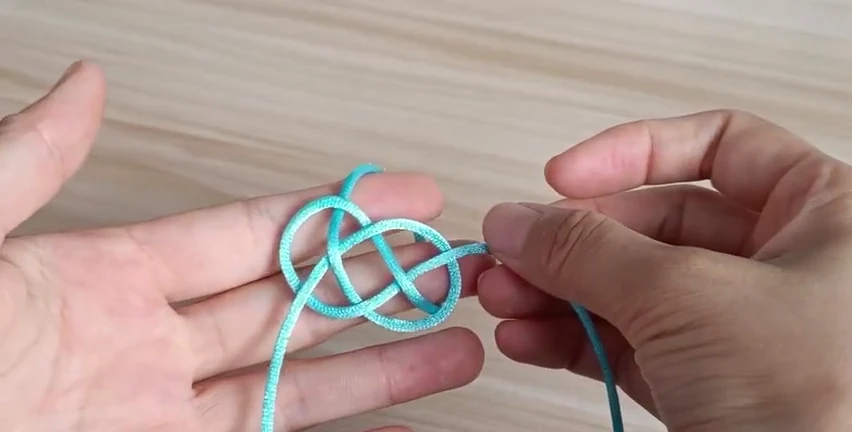
04. Spread the flat base
Lay the loose interlaced base across your fingers. Keep the central opening clear for the returning ends.
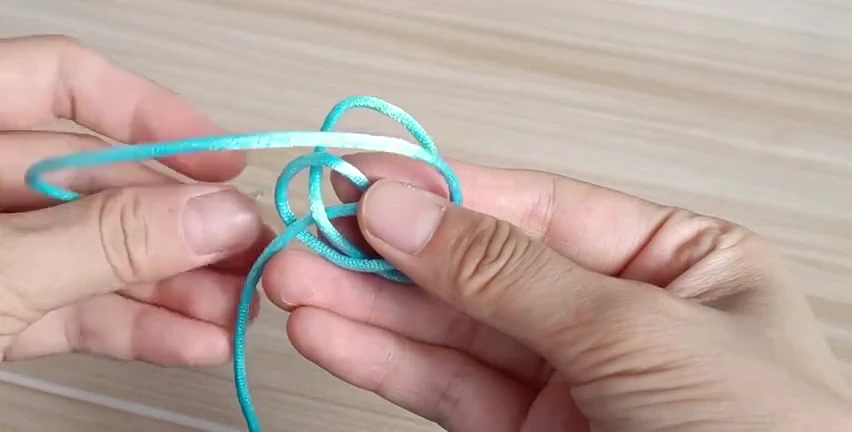
05. Return the first tail
Bring one tail back around the loose structure and draw it through the opening shown. Leave the surrounding loops broad.
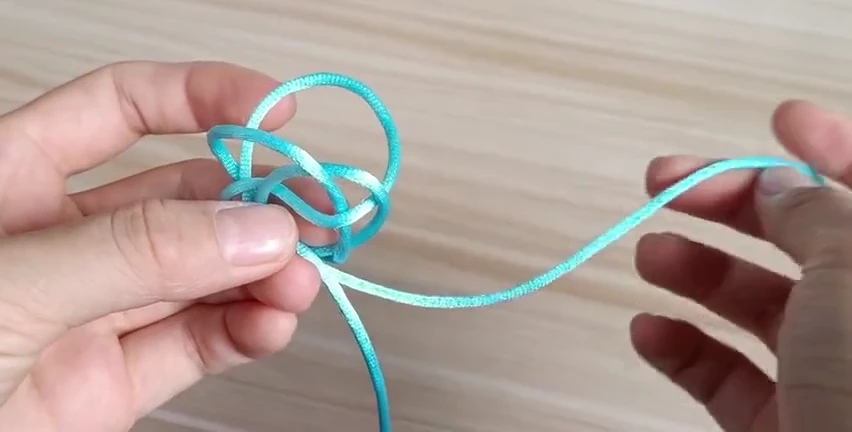
06. Return the second tail
Bring the remaining tail back into the centre, following the demonstrated opening. Pull it clear before tightening the knot.
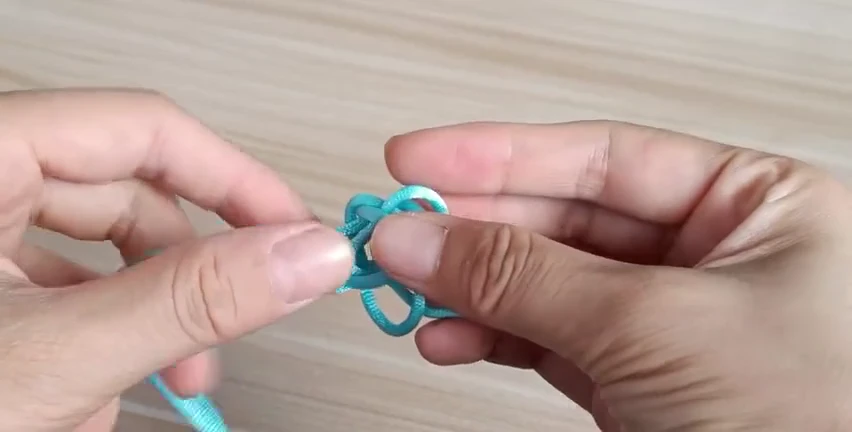
07. Gather the loops gradually
Hold the centre and ease slack through the outer loops in small amounts. Let the flat structure gather into a rounded knot.
08. Shape the round button
Work the remaining slack through with your fingertips. Gently pull the cord on both sides and round the compact knot.
Before you move on
- Both tails return into the structure before the loops are tightened.
- The final knot is compact and rounded, with no large loose side loops.
- The cord leaves the knot cleanly on both sides.
Tighten and shape gradually
- Keep the flat base loose through steps 1–4. You need its openings to place the returning ends.
- Check both returns in steps 5–6 before closing the structure. Replay 0:28–0:48 if a finger hides an entry.
- At step 7, hold the center and follow one cord section into its neighboring loop. Draw through a little slack, then continue around the structure so the flat base gathers evenly.
- At step 8, settle the remaining slack with your fingertips and compare the rounded surface with the finished frame. Check the size before making a receiving loop.
Common mistakes and how to fix them
- The base closes before the ends return. Loosen the base and revisit steps 4–6. Pulling the initial loops tight leaves too little room for the demonstrated return passages.
- One large loop remains beside the button. Use step 7 to trace the loose section to its next crossing and transfer the slack gradually. Pulling only the tails can leave another section loose.
- The knot stays flat or looks uneven. Compare the returns at steps 5–6 before forcing the shape. If the route matches, continue the small dressing movements at steps 7–8.
Continue your practice
A few useful answers
Before you begin
What is a Chinese button knot used for?
The compact round knot can be a decorative stopper or button-shaped detail on a cord accessory. Its size depends on the cord and how closely the knot is dressed; test a sample against the opening you plan to use.
Is this a complete Chinese clothing frog closure?
This demonstration teaches the round button knot. A complete clothing frog fastening also requires a matching loop and secure attachment to the garment; the video does not teach that assembly.
Why will my button knot not tighten into a round shape?
First check the two returning ends against steps 5 and 6. Once the route matches, keep the center supported and move slack through neighboring sections in small amounts, as shown at steps 7 and 8.
Can I use the button knot for a bracelet?
It can be a button-shaped fastening component when paired with a suitable receiving loop. This basic lesson demonstrates the knot, rather than a complete bracelet; practice the fit before finishing your accessory.