
A cord that makes a neat bracelet may feel too fine for your first open-loop ornament. A glossy tassel thread may drape beautifully yet struggle to hold those loops. Choose Chinese knotting cord by its fiber, diameter and construction, then try the actual knot before buying a large quantity.
A practical first sample: try round, braided nylon knotting cord around 1.5 mm in a plain, easy-to-see color. Keep the loops loose while learning the button knot or four-loop good-luck knot. This is a starting choice for practice; use the lesson’s specified cord and length when they are provided.
Read the fiber label, not just “satin”.
Satin cord and rattail cord describe a smooth, glossy type of cord. The names do not guarantee silk: products sold under them can be nylon or rayon, and some have a cotton core. “Chinese knotting cord” is also a shopping description, so check the material listing rather than assuming every spool is the same.
| Cord or thread | What to look for | What to check before committing |
|---|---|---|
| Braided nylon knotting cord | A round braid with enough body to support loops, while bending easily through crossings. | Try tightening and reopening a knot. Check comfort if it will touch skin. |
| Nylon satin / rattail | A smooth, shiny surface for a decorative finish. | Test whether your chosen loops and closure stay where you place them. |
| Rayon satin / rattail | A softer, slippery option with a glossy finish. | Try the entire knot, especially open loops. Confirm the core fiber and finishing method. |
| Waxed cotton cord | A cotton option for a different surface finish. Some braided products keep a round profile. | Compare the actual coating, flexibility and finished knot rather than treating all waxed cords alike. |
| Polyester or other synthetic cord | The exact fiber and construction on the product label. | Make the same sample you would for nylon. A shared diameter does not establish matching handling or finishing. |
| Cotton embroidery thread | Fine strands for a separate tassel or binding thread. | Make a small fringe to judge fullness. It need not be the same material as the main knot. |
A useful knotting cord has some body: it should bend into the route without collapsing into a limp tangle. Compare samples in your hands. A product photograph can show sheen and color, but it cannot show how your knot tightens.
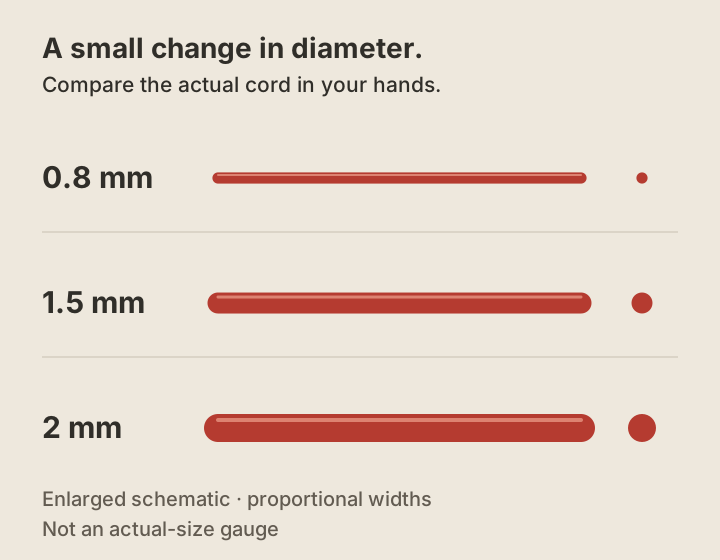
Choose a diameter you can see and use.
| Example diameter | Where to try it | Check first |
|---|---|---|
| Around 0.8 mm | A small bracelet or fine detail. | Can you follow the crossings clearly, and do the intended bead holes accept all required passes? |
| Around 1.5 mm | A visible practice knot or modest ornament. | Does the tightened knot keep the size and loops you want? |
| Around 2 mm | A larger practice piece or decorative hanging knot. | Is the final knot too bulky for its bead, closure or position? |
These are places to begin experimenting, not required sizes. A thicker replacement changes the space occupied by each crossing; repeat the sample and length estimate after changing diameter. If a supplier uses a number such as “#1”, ask for the diameter in millimeters too.
Measure cord gently with a caliper if you have one: squeezing a soft cord changes the reading. For beads, test the actual piece of cord through the actual hole with the number of passes your design needs. Two tails through one hole require a different check from a single strand.
Make one small test before a whole project.
- Bend and lay out. Make a loose loop and a crossing. Notice whether the cord twists, kinks or refuses to stay in place.
- Tie the knot you intend to use. Follow the lesson slowly. Dress the crossings and tighten in small movements, keeping the decorative loops at your chosen size.
- Check the result. Set it down, pick it up and gently handle the loops. Compare its size with your planned bracelet or ornament.
- Keep a labeled sample. Record fiber, supplier, stated diameter, color and cut lengths. Reuse this record only when the cord and knot pattern match.
If the working ends are hard to follow, add a small removable tape flag to one end. For a lesson that genuinely uses two separate cords, contrasting colors can help. Do not split a single-cord knot into two merely to copy a color diagram.
A bracelet, an ornament and a tassel need different checks.
A bracelet: fit, feel and closure
Choose a flexible sample that feels comfortable against your wrist. Check the finished band width, bead holes and the full closure before trimming. Open and close an adjustable fastening repeatedly; a decorative loop that looks neat on a board is not a closure test. Follow the Chinese knot bracelet lesson for its particular cord route and fit checks.
A hanging ornament: readable crossings and balanced loops
For an open-loop design, try cord with enough body to keep the outline clear. Lay out the good-luck knot loosely, then adjust each loop before final tightening. Check the hanging loop and attachment separately from the decorative center. Keep the reference sample beside you so the next piece has comparable proportions.
A tassel: separate fringe from structure
You can use a different material for the fringe. Cotton embroidery thread is one straightforward option for a small handmade tassel; select the color, strand count and fullness with a sample. If you want fringe from the knotting cord itself, first check whether that braid separates cleanly. Some satin cords can be unbraided for fringe, but a core or different construction changes the result. Follow the tassel exercise to wrap, bind and trim, then check its scale beside the knot.
Estimate cord length from a measured sample.
There is no single “finished length × a number” rule for every Chinese knot. Knot structure, cord thickness, loop size and tightening all change consumption. The space you need while tying also exceeds the cord left inside a finished knot.
- Start with the lesson. Use its cut list when available. If you change the cord or add repeats, make a sample before cutting your final pieces.
- Measure and label each strand. Record its starting length. For a repeating bracelet band, make several complete repeats at the tension you will actually use. Measure the finished sample along the band.
- Measure consumption per strand. Subtract the total remaining loose length from that strand’s starting length. A core strand and a working strand may consume different amounts. Include every loose end of a strand in the remainder.
- Scale only a matching repeat. Divide the target band length by the sample band length, then multiply each strand’s consumption by that result. For an individual ornament knot, repeat a complete sample instead of scaling from its front-view height.
- Add the other parts and room to work. Allow separately for the measured closure, hanging loop, connectors, intended tails and enough extra length to grasp and thread the ends. Keep a little extra until the final fit is checked.
Hypothetical bracelet calculation, for one strand: a 5 cm sample uses 35 cm of that strand. A 15 cm band with the same repeat would use about 35 × (15 ÷ 5) = 105 cm. If this design’s closure and tails need another 20 cm, and you choose 30 cm of extra working room, the trial cut is 155 cm. These numbers illustrate the arithmetic; they are not a measured recipe or a recommended allowance for every bracelet. Calculate the other strands separately.
A compound ornament may contain several distinct knots, links and a tassel. Measure those components with the same cord and keep their tying allowances. A digital drawing or Designer composition gives a visual plan; it does not calculate physical cord consumption.
Gather a small, useful tool kit.
- Sharp scissors: for a clean cord cut and a level tassel fringe.
- Ruler or tape measure: for cut lengths, finished samples and bracelet fit.
- A padded knotting board and pins: useful for holding a more complex layout while you follow the cord. Place pins beside the cord rather than piercing it.
- Smooth tweezers or a blunt threading aid: to guide a tip through a crowded opening. Keep enough slack to pass the cord without scraping it.
- Clips or removable tape: to hold a bracelet’s starting point and label working ends.
- Needle and matching thread: if the chosen design uses stitching to secure or conceal an end.
For a tassel, add a firm card for wrapping and a separate binding thread. Beads, end caps and other findings belong to the chosen design; check their holes and attachment method before buying. You do not need a full tool set for a first practice knot.
Check color and finish on an offcut.
Colorfastness belongs to the actual product
Do not assume every nylon or rayon cord is washable or colorfast. Some satin cords can release dye when soaked. Read the supplier’s care information and use a spare piece to check for transfer onto damp white cloth before pairing a dark cord with pale fabric. This is a small screening check, not proof of long-term wash or wear performance.
For a bracelet, keep the first sample out of showers and pools until you know the product’s care requirements. For a multicolor ornament, buy enough matching cord for the planned piece and retain its color or batch label.
Match the end treatment to the fiber
Nylon can be heat sealed; rayon/cotton cords do not finish the same way. Use heat only when the product explicitly permits it and follow the tool’s instructions. Do not use a flame test to identify an unknown cord. A fused tip prevents fraying; it does not establish that a closure is secure.
Choose the design’s specified knot, stitched finish or compatible cord end. If adhesive is specified, check its material compatibility, test a hidden offcut and let it cure before handling. Keep adhesive out of sliding sections. Make the fit and closure checks before cutting the remaining tails.
Trim after the shape is settled
Dress the crossings, balance the loops and check the piece in its intended hanging or wearing position. For a tassel, gather the strands before making a straight trim. Stop if the attachment or closure slips; fix the structure before finishing the ends.
Put the sample to work.
Practice the button knot, make a bracelet, or finish a small ornament with a tassel. To explore color and proportion on screen, use the DIY Designer or the Illustrator drawing guide, then return to a physical sample for cord length and handling.
A few useful answers
Before you begin
What cord should a beginner use for Chinese knotting?
A round, braided nylon knotting cord around 1.5 mm is a practical first sample because the crossings are easier to see than with very fine cord. Check that it bends easily and has enough body for your chosen loops. Follow the lesson’s specified material and cut list when provided.
Is rattail cord the same as silk cord?
No. Rattail or satin cord can be made from nylon or rayon, and some products have a cotton core. Check the fiber listing, diameter and finishing instructions rather than assuming a shiny cord is silk.
How much cord do I need for a Chinese knot bracelet?
Use the lesson’s cut list or measure a sample made with the same cord, repeat and tension. Record the consumption of each strand separately, scale it to the target band length, then add the closure, intended tails and room to work. There is no universal multiplier for every bracelet.
Can I use the same cord for the knot and the tassel?
You can, if the actual cord produces the fringe you want. Some satin braids separate into fibers, but their cores and construction vary. A separate embroidery thread tassel is another option; make a small sample to compare fullness, color and scale.
Can I burn the ends of any Chinese knotting cord?
No. Nylon can be heat sealed, but rayon/cotton cord does not finish the same way. Use heat only when the product permits it and follow the tool’s instructions. For an unknown fiber, use an appropriate knot, stitched finish or compatible cord end instead of a flame test.