
The bracelet you will make
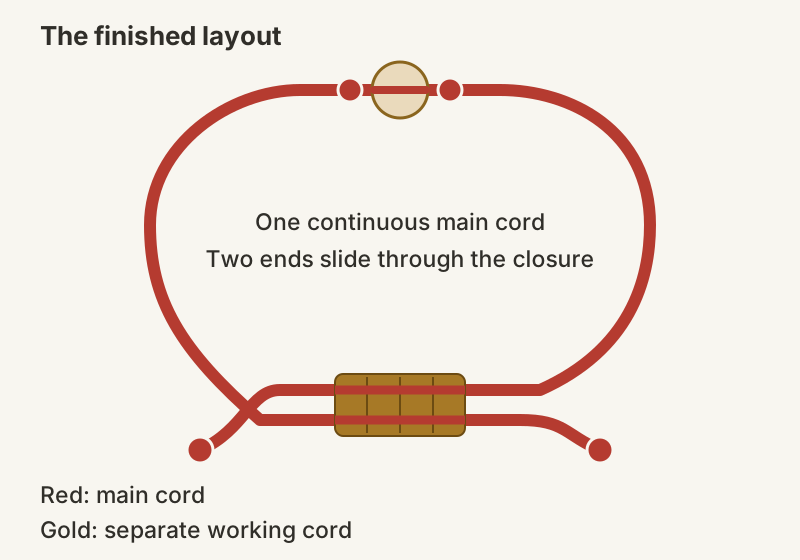
A simple red cord, one optional bead and a sliding flat-knot closure. This beginner bracelet uses Chinese knotting cord and the flat macramé square knot, 平结, taught in our foundations course. The slider is practical macramé construction; the bracelet is a contemporary craft project.
Choose a contrasting cord for your first slider so you can see its crossings. You can use the same color as the bracelet once the movement feels familiar.
Two lengths of cord, a few simple tools
- Main bracelet cord: smooth Chinese knotting cord, around 0.8–1 mm for a first practice piece. Start with a generous 60 cm (about 24 in) length, then check it against your hand before cutting.
- Slider cord: a separate 40 cm (about 16 in) length of the same thickness. Leave it longer if thicker cord or a longer slider makes the ends awkward to hold.
- Optional center bead: choose a smooth hole that passes your actual cord freely. Test it on an offcut first.
- Tools: flexible measuring tape or a paper strip and ruler, scissors, removable tape or clips, and jewelry adhesive labeled suitable for your cord.
The cut lengths are practice allowances, not a finished-size formula. A larger hand, a bulky bead or thicker cord needs more material. Keep the main tails long until the bracelet passes the final fit check. Our cord and tools guide helps you compare materials and test a sample.
1. Measure the wrist and the opening
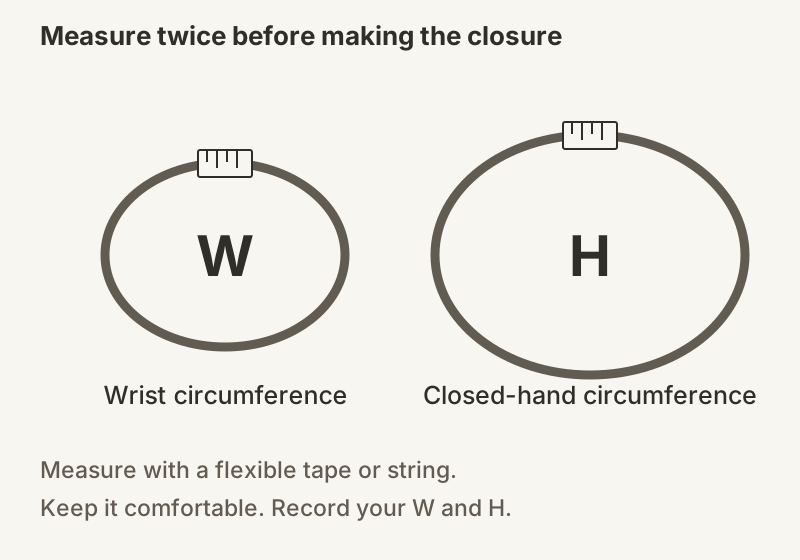
Wrap a tape around the wrist where you will wear the bracelet. Leave the amount of ease that feels comfortable and record this as W. Then measure around the widest part of your hand with your thumb tucked in, as if slipping on a bracelet. Record that opening as H.
A slider must cover both sizes. Before tying, bend the uncut main cord into a loop that passes over the hand, then bring its ends together with enough overlap to hold and knot. If the starting length does not leave this room, use a longer piece now.
2. Place the bead and overlap the ends
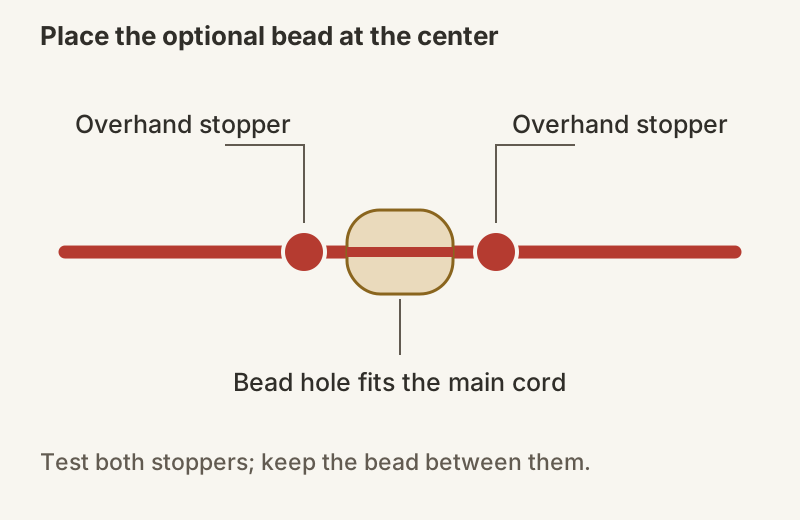
Find the center of the main cord. If using a bead, tie a small overhand knot beside the center, thread the bead on, then tie another overhand close to its other side. Check that the bead cannot pass over either knot. Use a bead with a smaller hole or a larger stopper if it can.
For a plain cord bracelet, leave out the bead and these two center knots. The sliding closure works the same way.
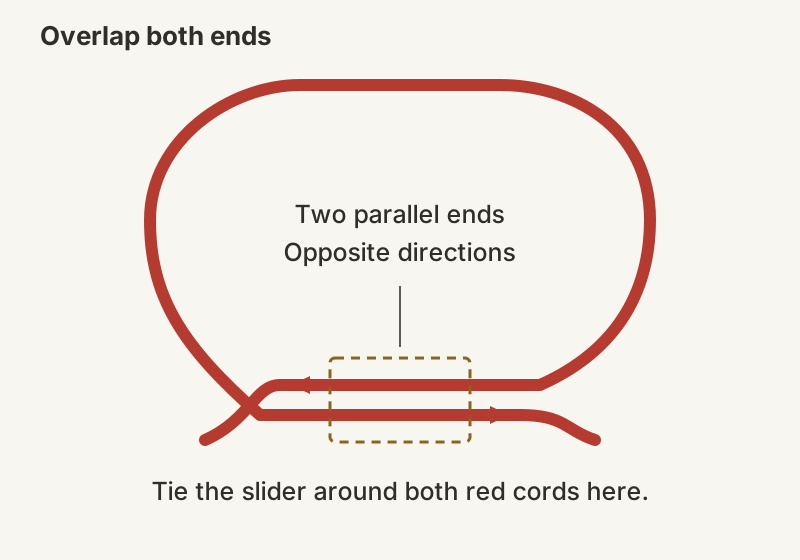
Curve the main cord into a bracelet with the bead at the front. Cross its two ends past one another at the back, then lay a short section of them parallel in opposite directions. Hold them beside each other with removable tape on either side of the working area. Do not tie the main ends together.
Put the midpoint of the separate slider cord behind both parallel main ends. Its two working ends now emerge to the left and right.
3. Make the two halves of a flat knot
Keep the two main ends together as the core. Only the separate slider cord makes the loops. The demonstration below uses white for the core and turquoise for the working cord; on your bracelet, the core is the pair of overlapped red ends.
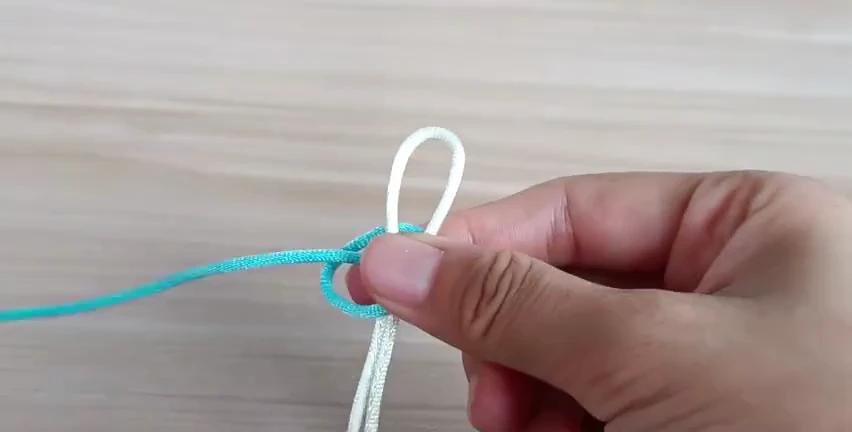
First half: take the left working end across the front of both core strands, keeping a loop on the left. Take the right working end over that crossing end, behind both core strands, then forward through the left loop. Pull the working ends out to the sides to seat the half-knot. Keep it snug enough to hold its shape without pinching the core immovably.
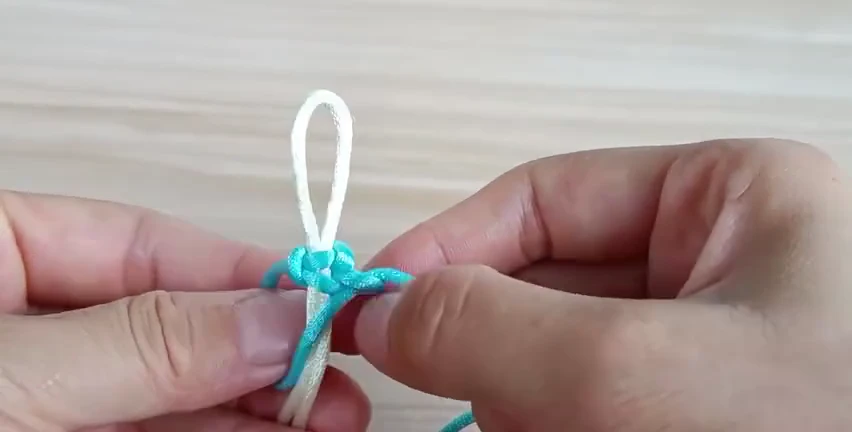
Second half: begin from the right this time. Take the right working end across the core, leaving a loop on the right. Take the left working end over it, behind both core strands and forward through the right loop. Seat this half directly against the first.
That is one complete square knot. Alternating left and right keeps the sleeve flat; repeating just one half makes a spiral.
49-second foundation demonstration of the flat knot. Follow this page for bracelet assembly and fitting.
Open all seven close-up steps of the flat macramé square knot →
4. Build the sleeve and test the slide
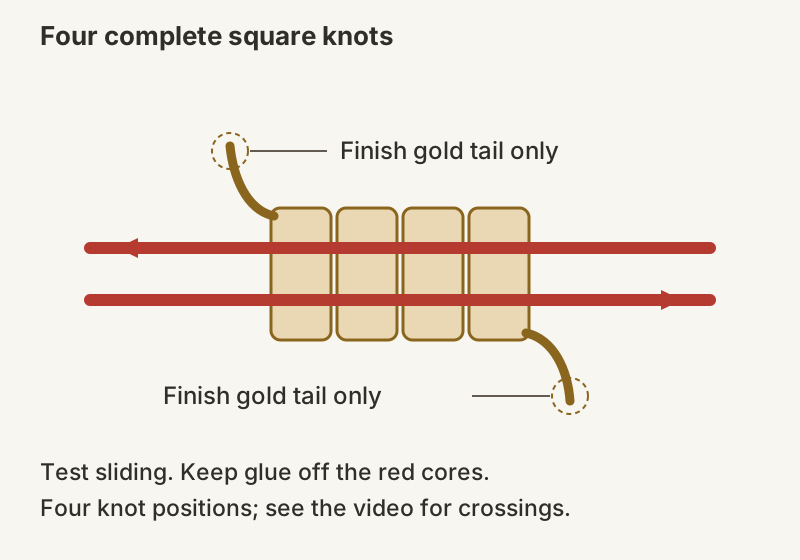
Add three more complete square knots, alternating the starting side for each half. Four complete knots are a useful first sample; their finished length will depend on your cord. Push neighboring knots together gently.
Remove the tape. Hold the sleeve and move each main end through it individually. Then open the bracelet by easing cord out into the wrist loop, and close it by pulling the two main tails outward. The sleeve should hold its adjusted position while still moving with a deliberate pull.
If it is jammed, loosen and re-tie the working cord now. If it is too loose to hold, re-seat the halves a little more closely. Do this before securing or trimming anything.
5. Secure the slider, fit the hand, then trim
Check both working tails at the end of the gold sleeve. Apply the smallest controlled amount of cord-compatible jewelry adhesive where each tail meets its outer finishing knot. Keep adhesive away from the two red sliding strands. Follow the adhesive label for ventilation, handling and full curing time; do not use an arbitrary drying time.
After the adhesive has cured, check that the sleeve still slides. Trim only the extra slider working tails, leaving a short margin beyond the secured knot rather than cutting flush. This lesson uses an adhesive finish; melting cord is not necessary.
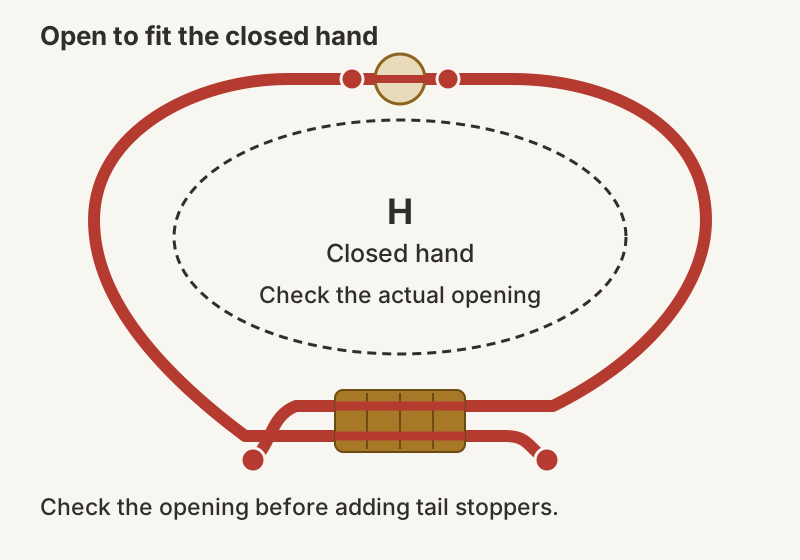
Open the bracelet and gently slip it over your hand. Make the opening large enough to remove comfortably too. At this fully open position, leave a little space outside each end of the sleeve and tie an overhand stopper in each main tail. Tighten the stoppers and test that neither can pull through the sleeve; enlarge a stopper if needed.
Try the bracelet on again and draw the tails outward until it sits comfortably at the wrist. Keep enough tail to grip when adjusting. Only now trim excess main cord beyond the stoppers, leaving a small margin. Treat fraying tips with a compatible product according to its directions, keeping them clear of skin until dry.
Final check: open it over the hand, close it at the wrist, remove it again, then tug each stopper gently against the slider. Nothing should unwind, pull through or scrape the skin. Re-tie or refinish a failing part before wearing it.
If the bracelet does not behave as expected
- The sleeve twists.
- You may have repeated the same half-knot. Undo the last wraps and alternate left-start and right-start halves.
- The sleeve will not move.
- Check for a main tail caught in a working loop, excessive tightening or adhesive on the core. Rebuild a stuck sleeve with fresh cord rather than forcing it.
- It fits the wrist but will not go over the hand.
- The opening is too small or the end stoppers were placed too early. Move the stoppers outward while there is spare tail; replace the main cord if it has already been cut too short.
- The bead escapes its stops.
- The hole is larger than the knots. Change the bead or the stopper size and test before wearing.
- The ends fray or feel sharp.
- Inspect the cord material and finish. Remove rough excess adhesive and remake the finishing knot if needed. A sample offcut is the place to test a new finish.
Keep the first one simple
Once the slider works, try a different cord color or bead. For a different fastening, study the Chinese button knot and pair a sample with a receiving loop; it needs its own fit test and replaces this slider construction.
For a hanging ornament next, learn the Chinese lucky knot. Use the DIY designer to explore colors and decorative combinations, and the materials guide when choosing your next cord.
A few useful answers
Before you begin
Which knot makes this bracelet adjustable?
A short sleeve of macramé square knots surrounds the two overlapped bracelet ends. The main ends stay straight and slide inside it; the separate working cord forms the sleeve.
How much cord do I need?
For a practice piece with roughly 0.8–1 mm cord, start with generous lengths of 60 cm for the bracelet and 40 cm for the slider. Check the main cord against the widest part of your hand, leaving overlap and gripping room, before cutting. Larger hands and thicker cord need more.
Can I make the bracelet without beads?
Yes. Omit the center bead and its two neighboring stoppers. Keep the sliding sleeve and the two main-tail stoppers so the bracelet still opens, closes and stays assembled.
Is the video a complete bracelet tutorial?
The 49-second video demonstrates the flat macramé square-knot movement using real cord. The illustrated instructions on this page add the bracelet measurements, overlap, sliding closure, finishing and fit checks.
Why is the slider stuck?
A main strand may be caught in a working loop, the knots may be too tight, or adhesive may have reached the core. Inspect and remake the sleeve as needed. Test sliding before finishing and again after the adhesive has cured.