
Basic knots · Lesson 18 of 18
Chinese Lucky Knot: Five-Loop Good Luck Knot
Follow the five-loop Chinese lucky knot using real video and eight timed frames. Keep the sections loose, complete the weave and balance the floral outline.
五耳吉祥结
The finished five-loop lucky-knot variant
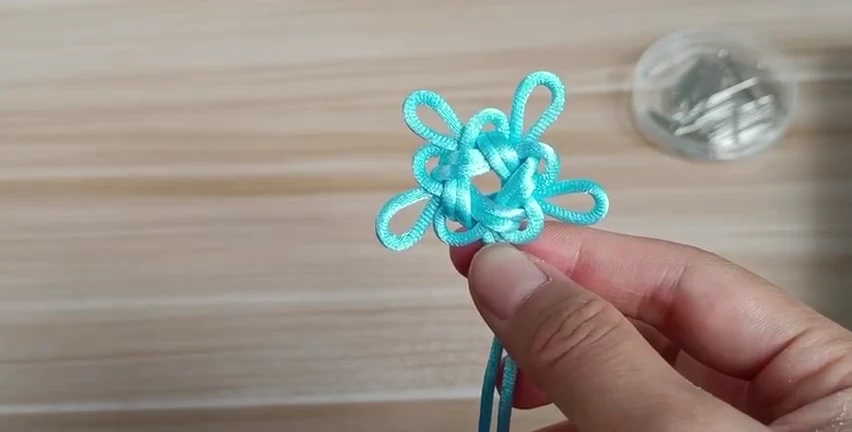
2:41 demonstration. Pause and repeat each movement at your own pace.
Follow the cord, step by step.
Each image comes from this demonstration. Tap its time to replay the movement.
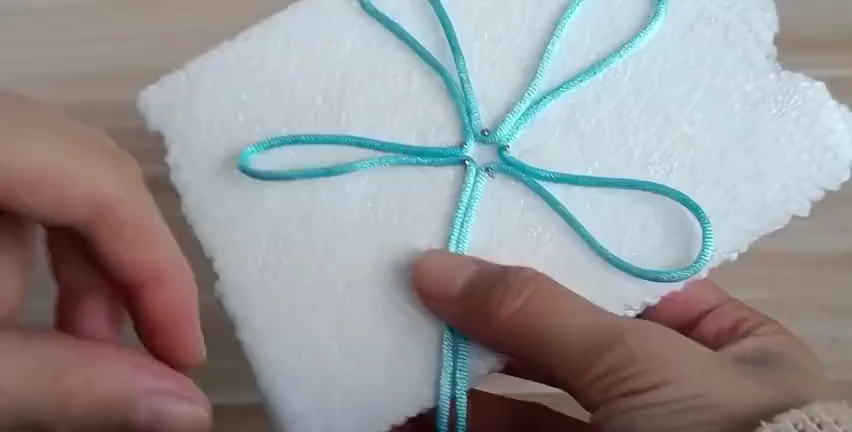
01. Set the five-section layout
Pin four open loops around the center and leave the paired lower strands below. Keep the loop bases together without collapsing their openings.
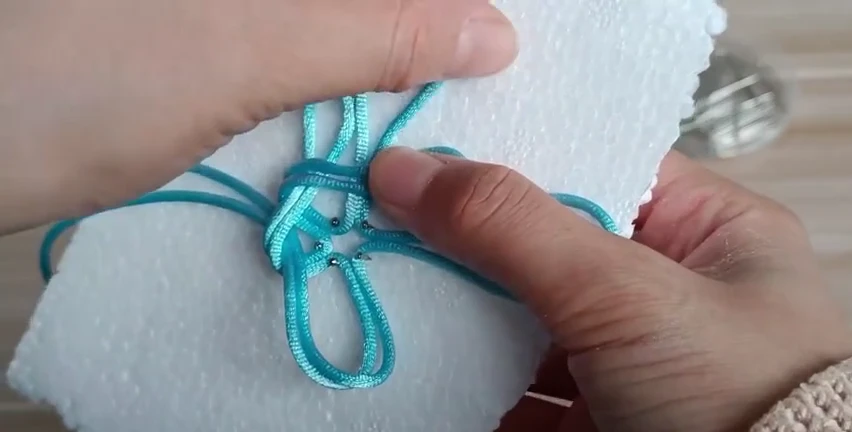
02. Continue folding around the center
Fold the next loop section across the center, keeping the preceding folds loose. Use 7–28 seconds for the order of the loop movements.
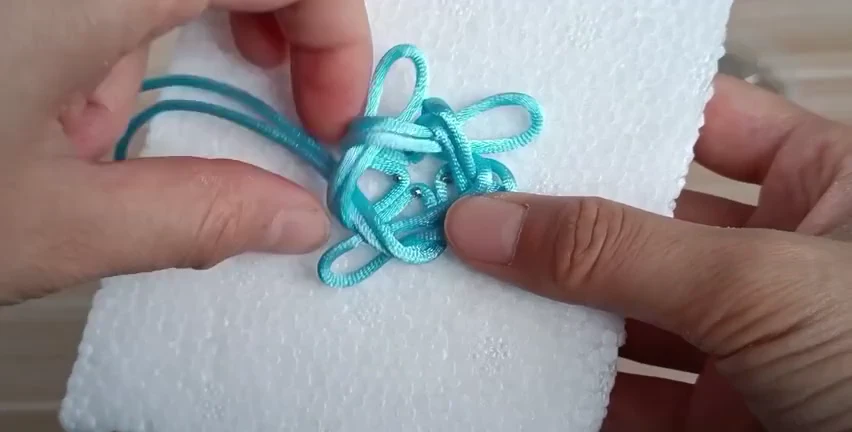
03. Inspect the open woven center
The first center has several visible openings. Check the position of each folded section before pulling the surrounding loops smaller.
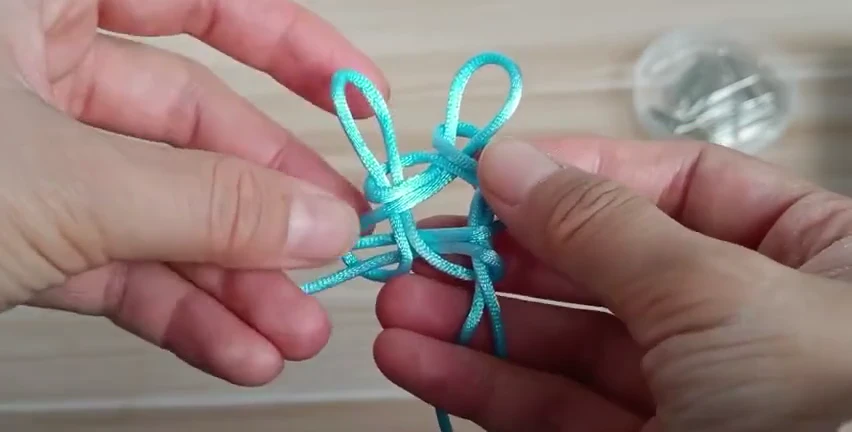
04. Arrange the loops off the board
After releasing the pins, hold the loose center in your fingers. Spread the main loops so the following off-board movements remain readable.
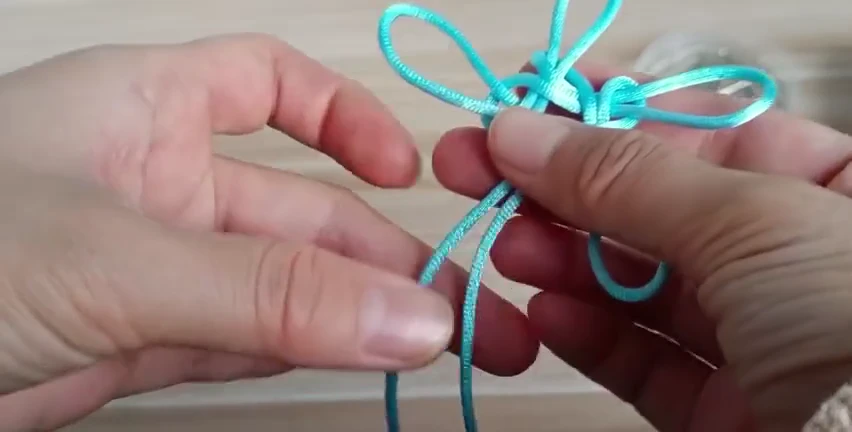
05. Work through the next arrangement
Follow the loop-by-loop adjustment around the center. Watch 63–84 seconds for the entries that the thumbs briefly cover.
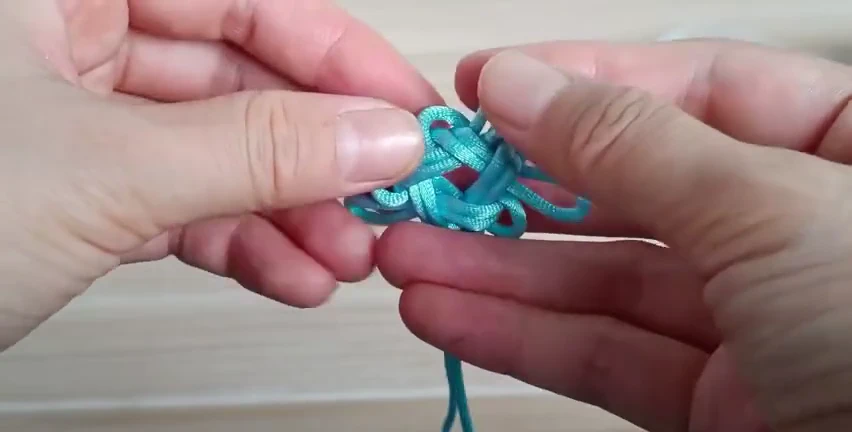
06. Seat the layered crossings
Hold the center and bring the crossings closer together. Draw slack through the surrounding sections a little at a time, preserving the main ears.
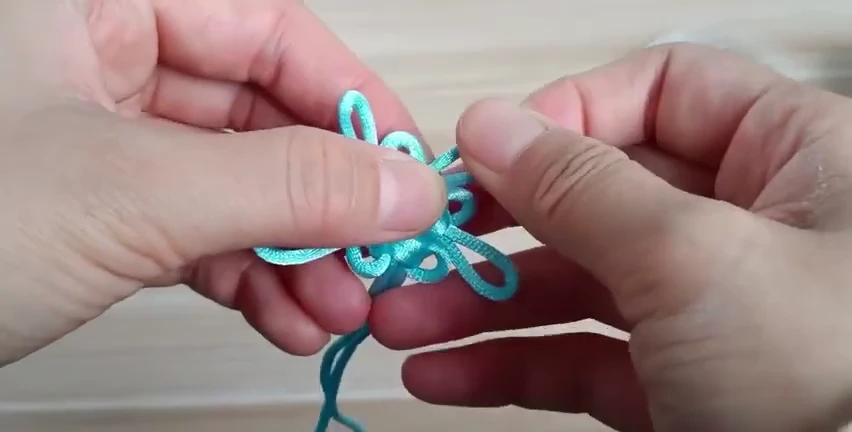
07. Balance the flower outline
Adjust the main ears and smaller edge openings around the center. Work around the whole motif so one side is not left with all the slack.
08. Check the five-ear motif
Compare the five main ears and their smaller neighboring openings with the demonstrated result. Keep the center compact and the tails together below.
Before you move on
- Five main ears remain around the finished center.
- The small edge openings remain visible rather than collapsing into one side.
- The flower outline is balanced and the two tails leave beneath the center.
Tighten and shape gradually
- At steps 1–3, keep the four pinned loops and the paired lower strands identifiable. Leave space to inspect the folds around the center.
- Release the pins at step 4 while supporting the loose weave. Spread the main loops so the next movements remain readable.
- Follow the off-board arrangement at step 5 before seating the layered crossings at step 6. Replay 1:03–1:24 where the thumbs hide an entry.
- At steps 7–8, work around the whole outline, moving small amounts of slack between adjacent sections. Compare main ears first and smaller edge openings second, then settle the two tails below the center.
Common mistakes and how to fix them
- The loop order becomes hard to follow. Reopen the center and compare the pinned layout at steps 1–3. Keep each working section separate rather than tightening an unclear fold.
- One side carries most of the slack. Use the shaping at steps 6–7 to follow the cord around the whole motif. Stop pulling a single tail once neighboring openings become uneven.
- The center is compact but the outline looks crowded. Compare the final main ears and smaller neighboring openings at step 8. Ease slack into a collapsed opening before adding a tassel or other component.
Continue your practice
A few useful answers
Before you begin
What is a Chinese lucky knot?
In this lesson, Chinese lucky knot means the Ji Xiang knot (吉祥结), also called a good-luck knot. This five-loop variant has a woven center, main outer loops and smaller edge openings. It can accompany a personal wish on a handmade ornament.
Is the lucky knot the same as the endless knot?
These lessons teach different cord arrangements. The floral good-luck knot here is separate from the interlaced Pan Chang or endless knot taught in the finished-project collection.
Why do the loops become uneven as I tighten?
Pulling one loop or the tails too far can move the slack into a neighboring section. Hold the center, follow the cord to the next crossing and move a little slack at a time. Compare the main loops separately from the smaller edge openings.
Does a good-luck knot need to be red?
This demonstration uses turquoise cord. Choose a color you can follow clearly while practicing, then select the colors and message for your own ornament.